Categories
General

Org Board.

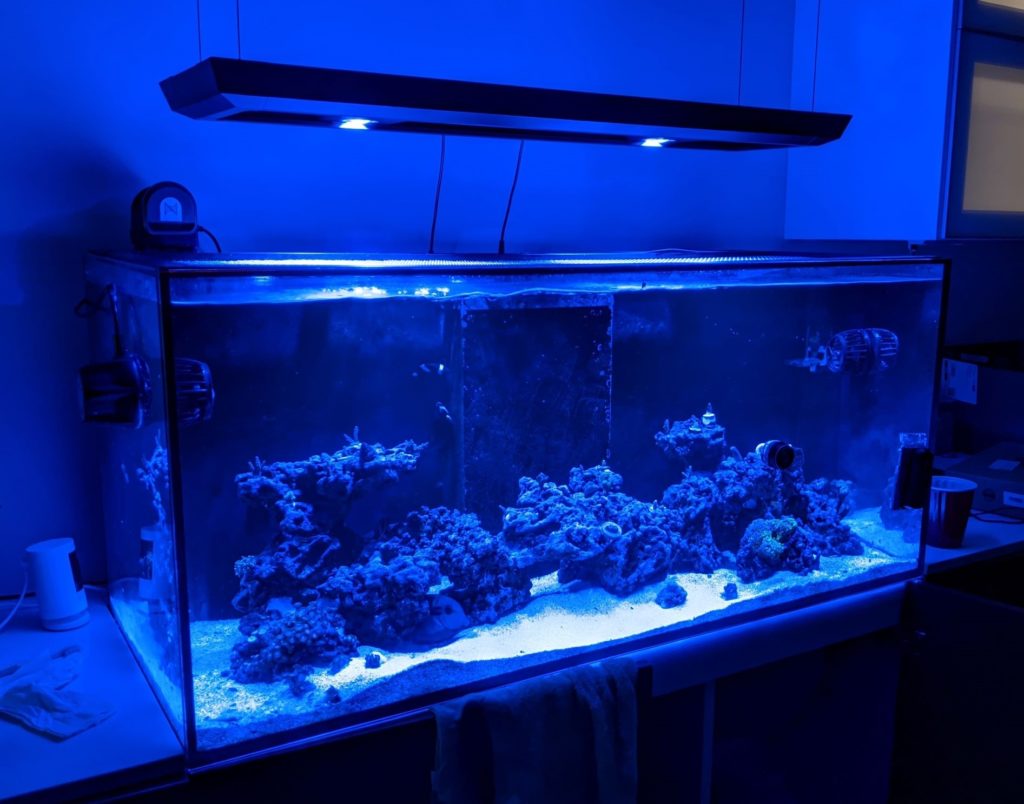
“That” side of the cabinet…

This weekend we decided to go to Ikea – adult Disneyland – just to see what other new storage and organization ideas the genius engineers have invented. As we were walking through the organizational section our eyes immediately lit up when we saw the SKÅDIS peg boards!

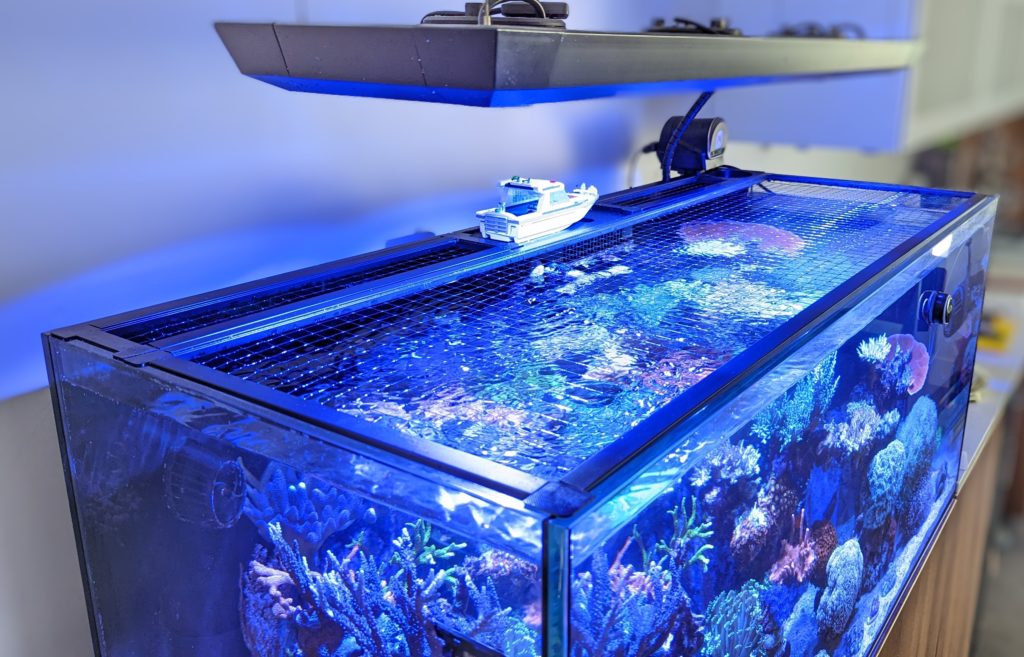
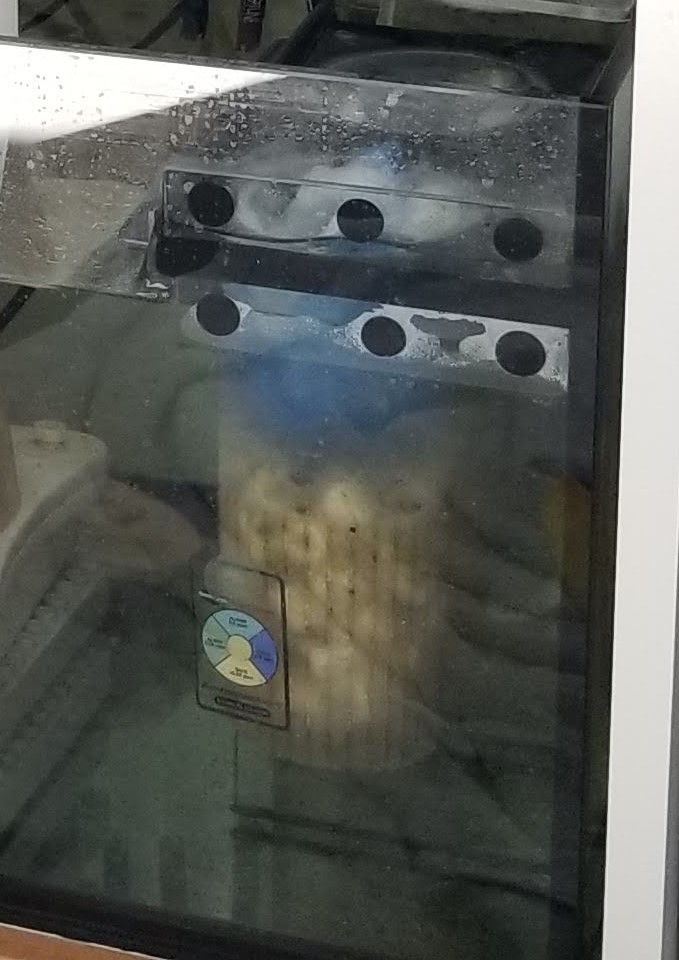
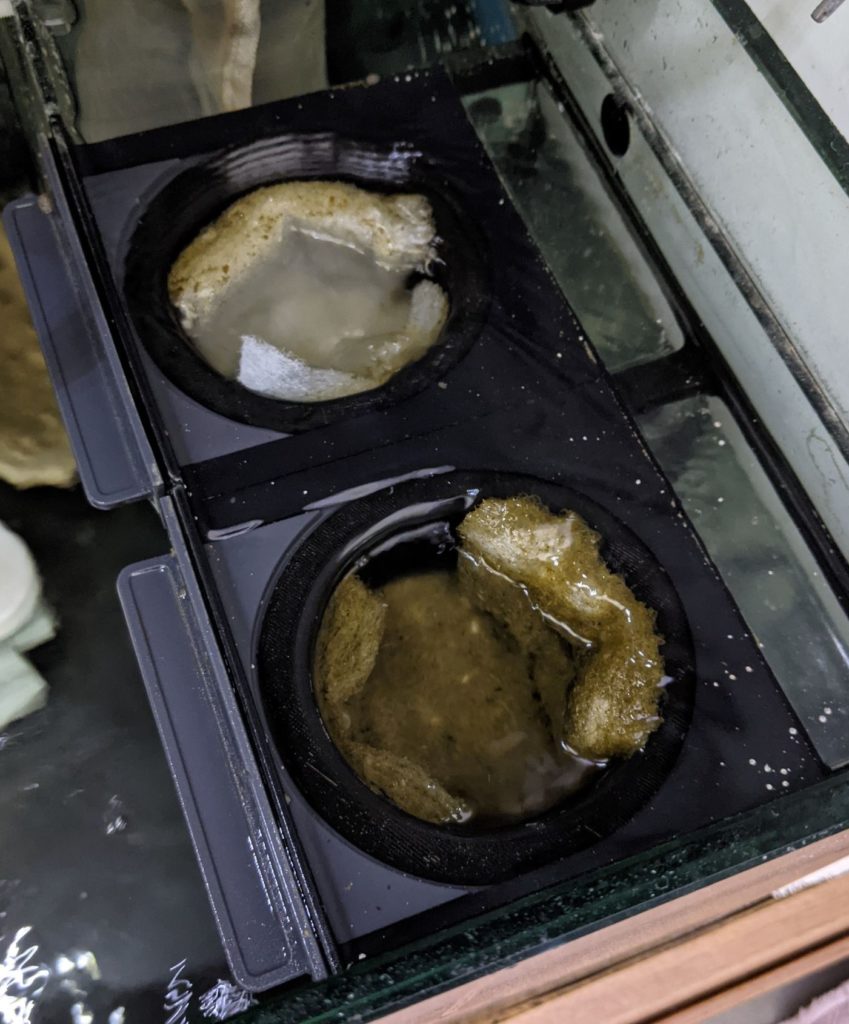
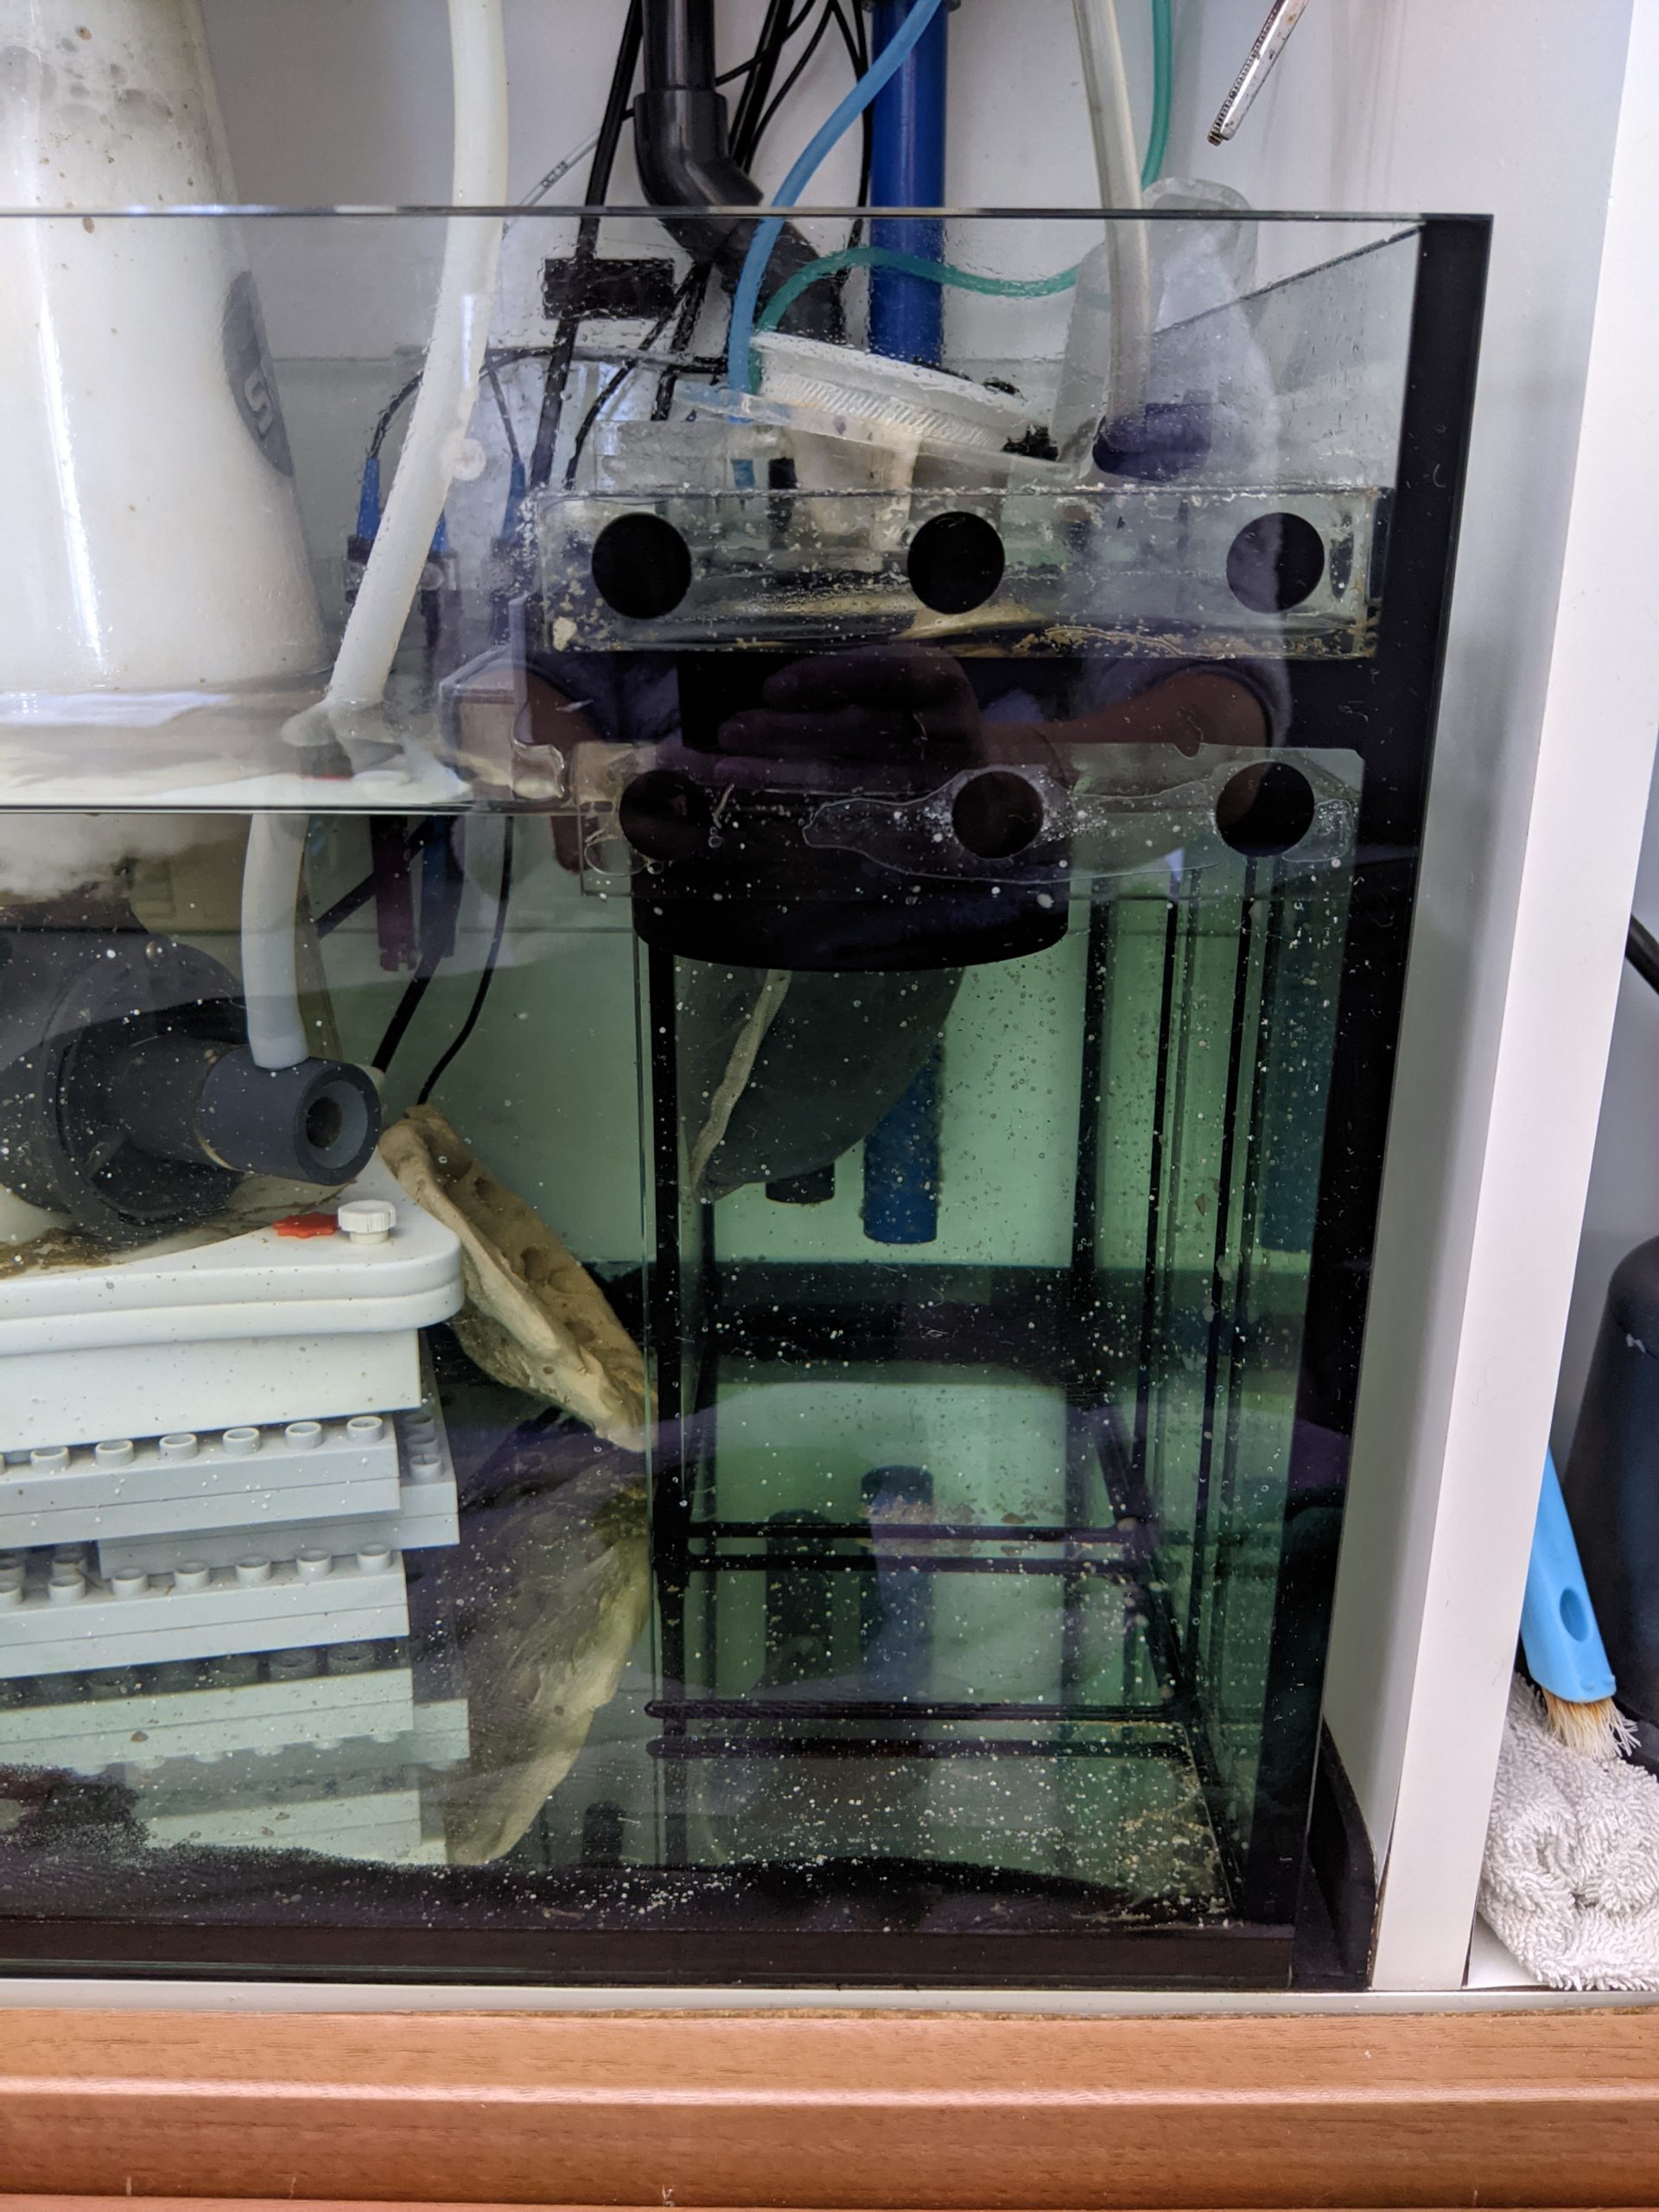
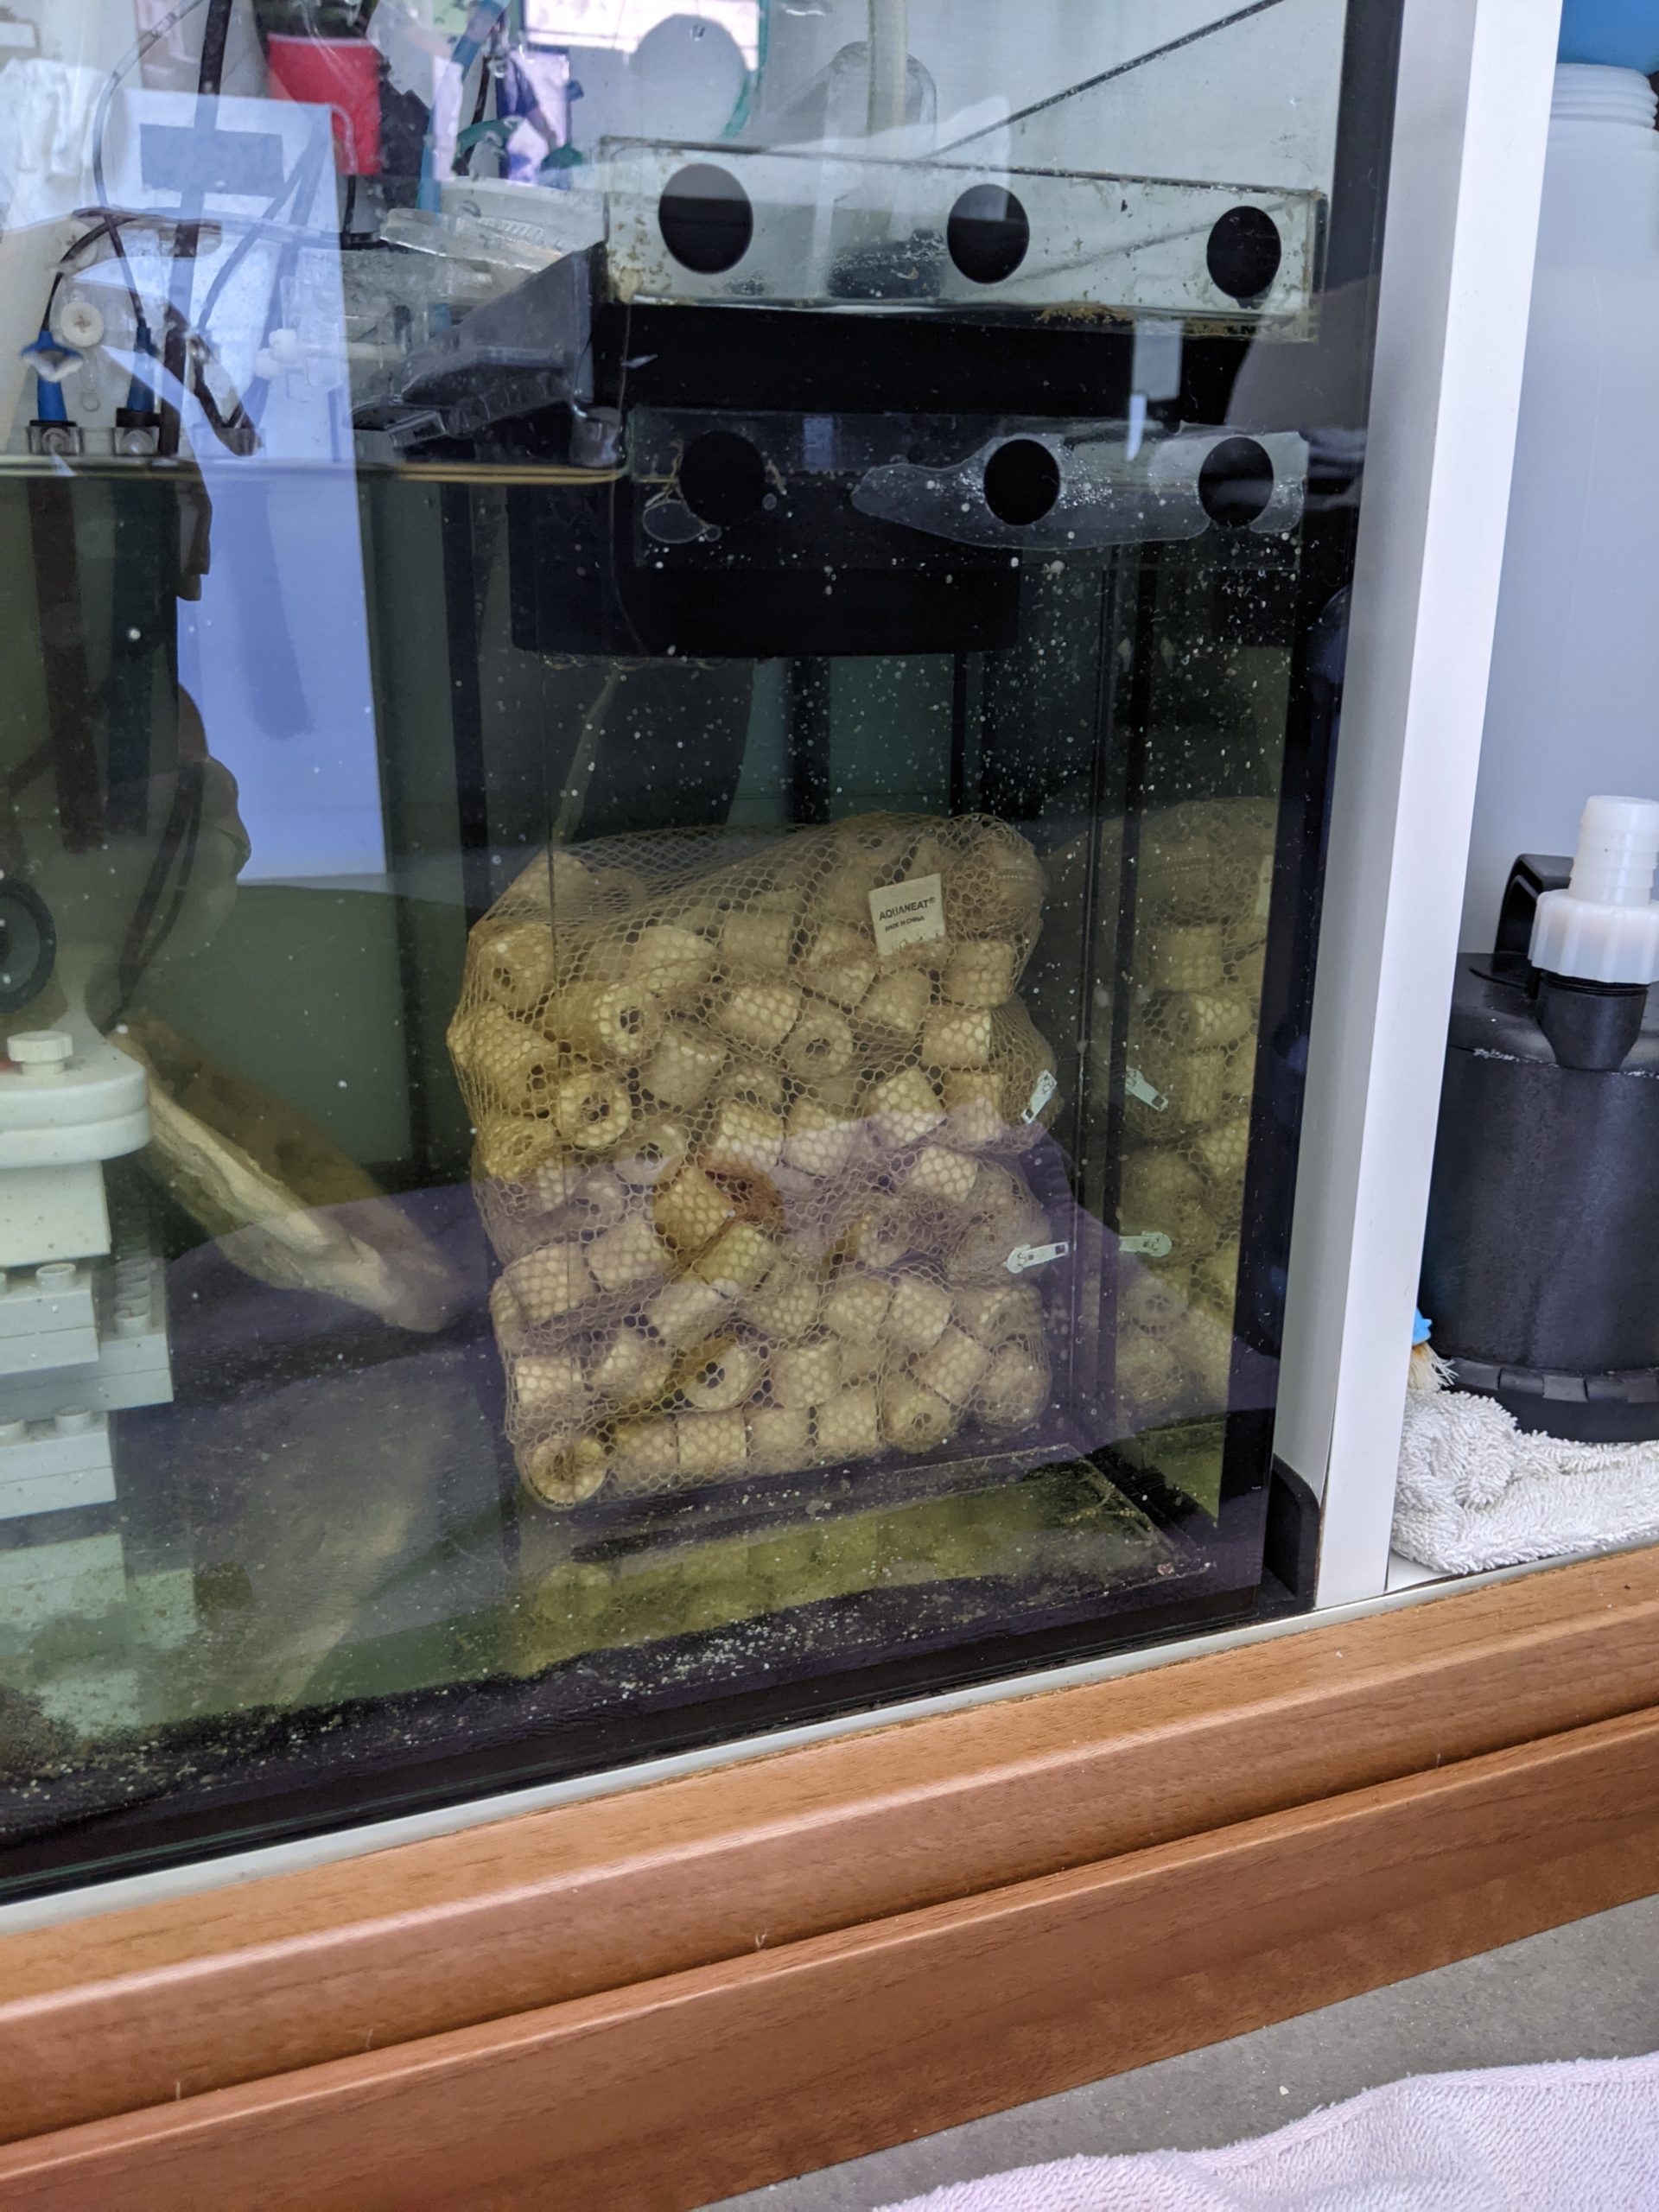
We are a little embarrassed to even show you what our current set up was. Actually, we don’t even have pictures of “that” side of the cabinet. This is the best we’ve got.

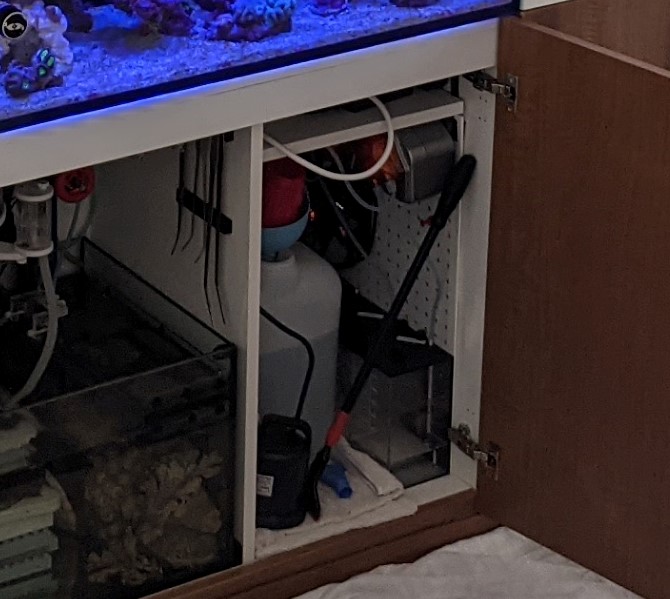
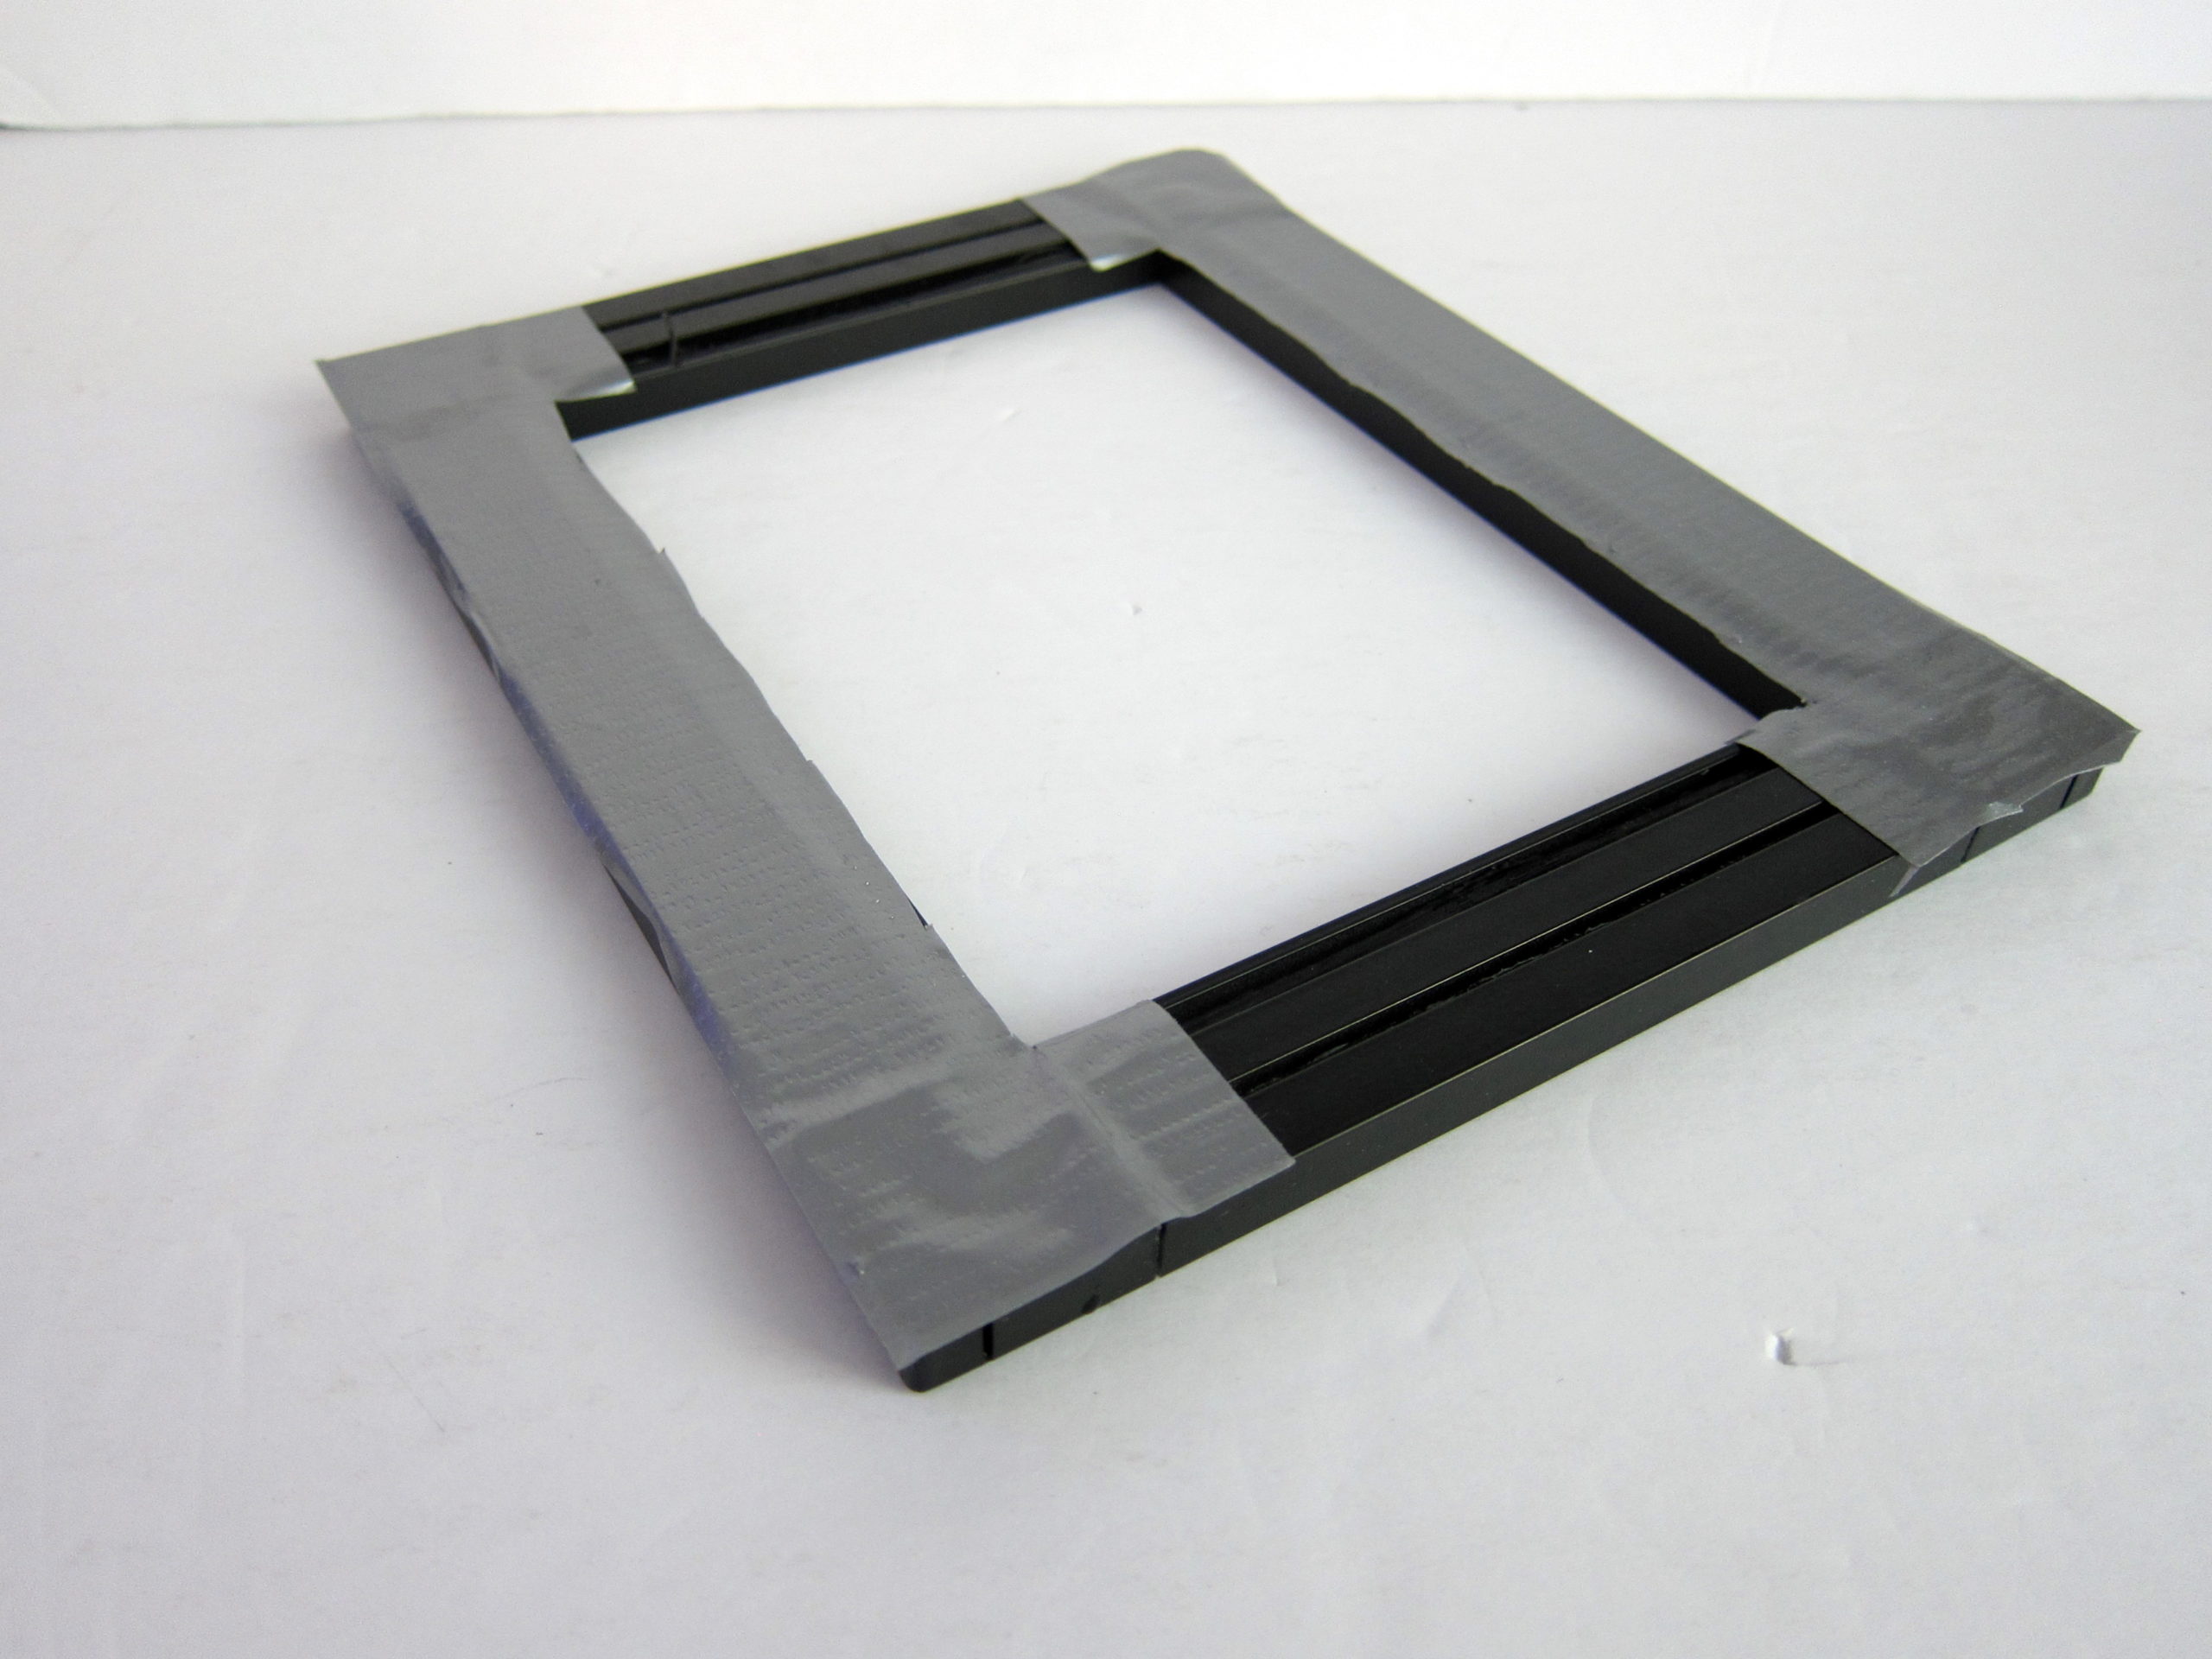
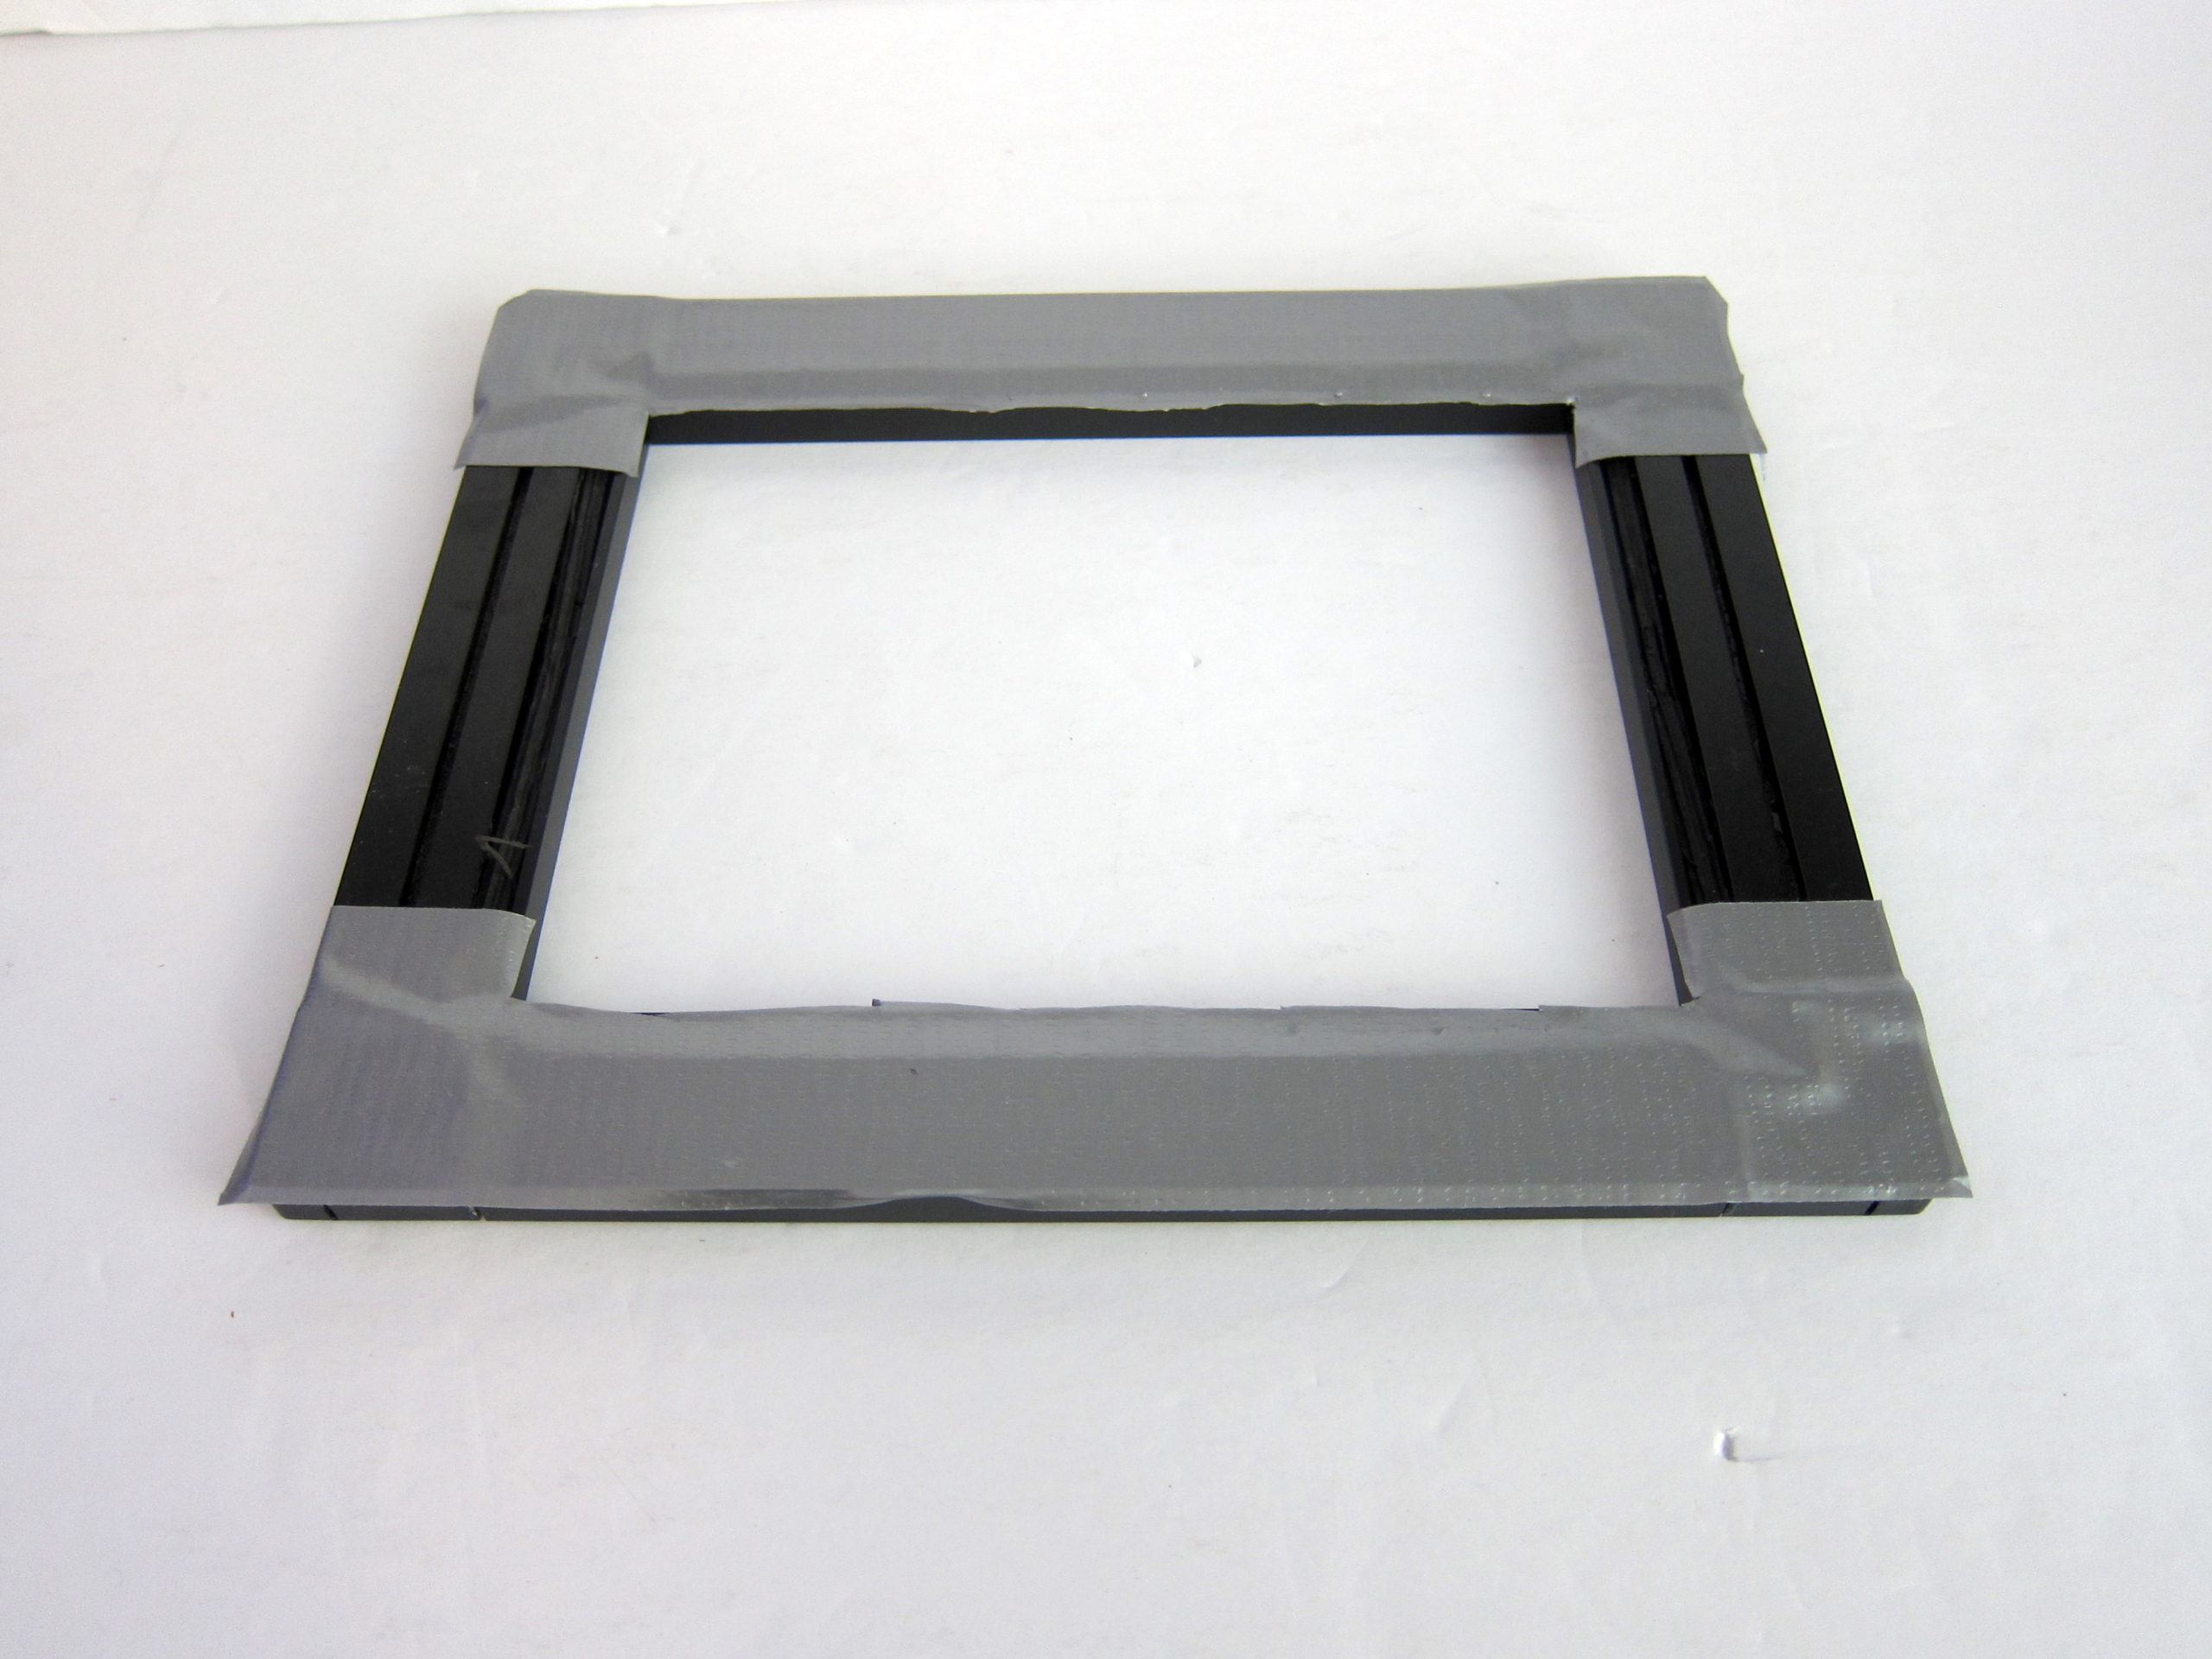
We have all seen the amazing pre-fab $400 controller cabinets. Our neurotic self wanted it so badly, but 2 things stopped us: 1) price and 2) we had built-in cabinets and we were not willing to figure out if/how a pre-fab box would fit. We also have an aversion to putting permanent nail holes into the cabinet – too much commitment. So, we decided that a Home Depot peg board would have to suffice. We had to cut this to size and then try to make it “look good” with white duct tape around the edges. Yuck!

When trying to build out this board, we found out very quickly that we were very limited on the hardware that we could use if we wanted the board to sit flush against the side wall. It also didn’t help organize the cabling AT ALL. We ended up using a bunch of zip-ties and velcro, stuffed all the cables in the back, turned a blind eye, and went on with life – although every time we refilled the top off water in the cabinet, we were reminded of the mess.

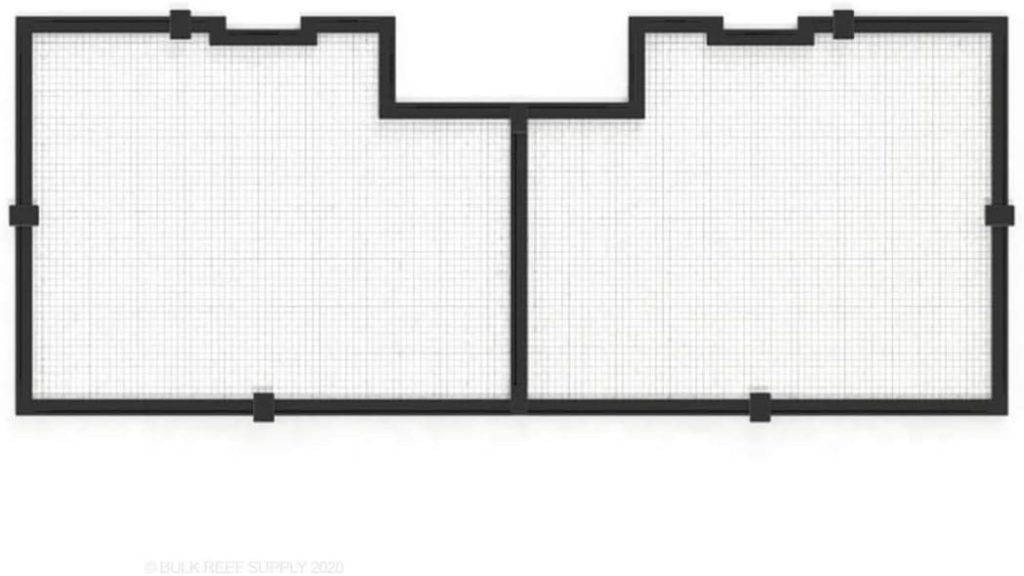
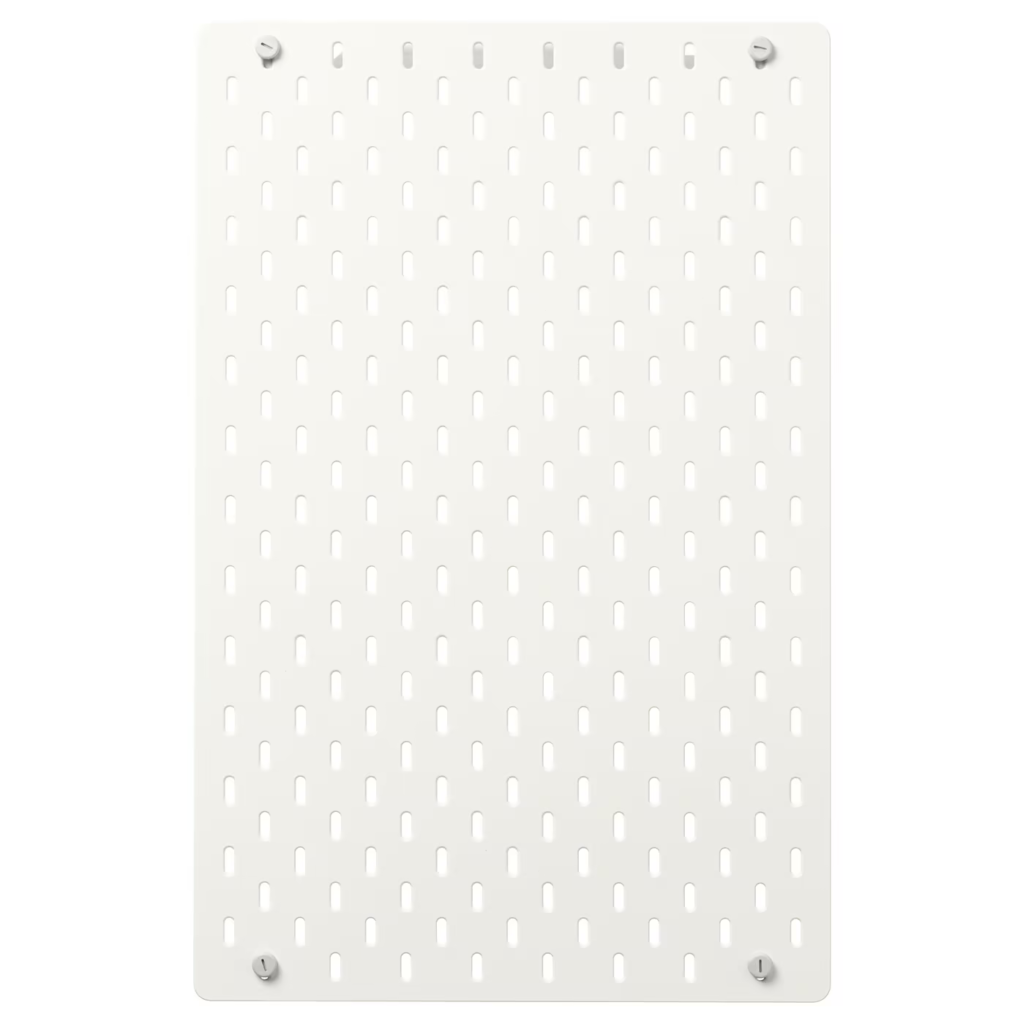
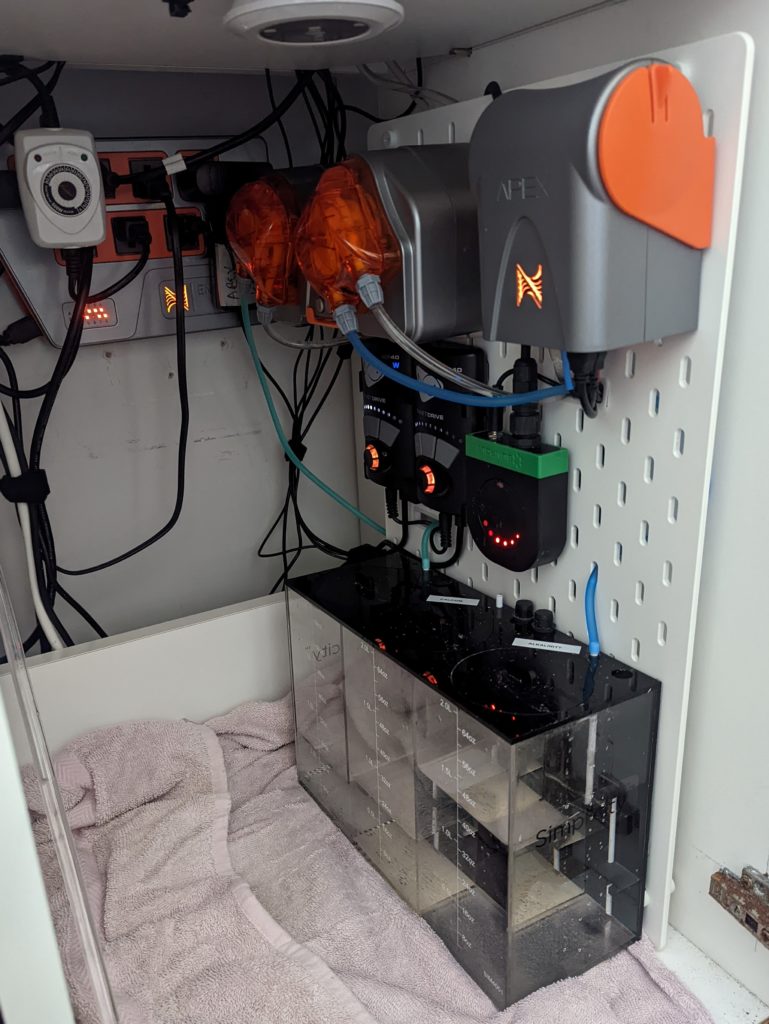
Fast forward to this weekend… Ikea! As soon as we saw the SKÅDIS peg board, the 30″x 22″ version in the living room display, our eyes lit up and our minds immediately started whizzing with ideas. The board is mounted with a metal bracket up top and has 1 inch standoffs. It was PERFECT for hiding cabling behind the board. Then, we looked at the size of the board again and our heart dropped. The board size would have to be modified to fit the cabinet.

We left the living section and sulked a little bit while pondering if it may still be worth it if we had to modify the size? Then, we turned the corner into the office section and low and behold…. it came in 2 additional sizes! 14.5″x 22″ was the size we needed – no modifications necessary. Best part – it’s only $17.99*! Back on cloud 9!

Of course Ikea has everything covered and has a bunch of accessories to mount and hang anything you could possibly need in normal day life. As we all know, nothing in reefing is easy and nothing in reefing is “standard.”

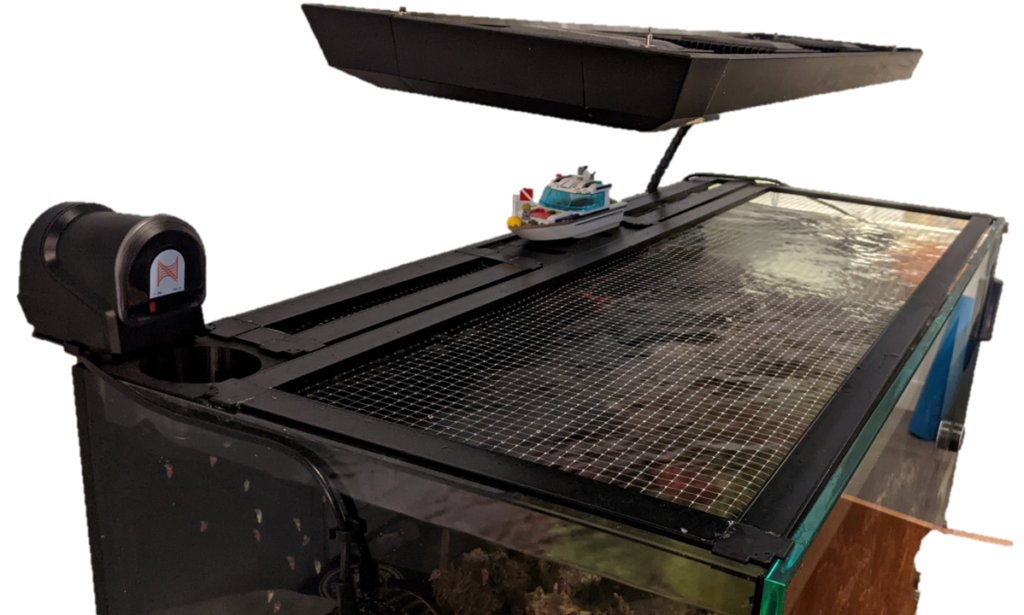
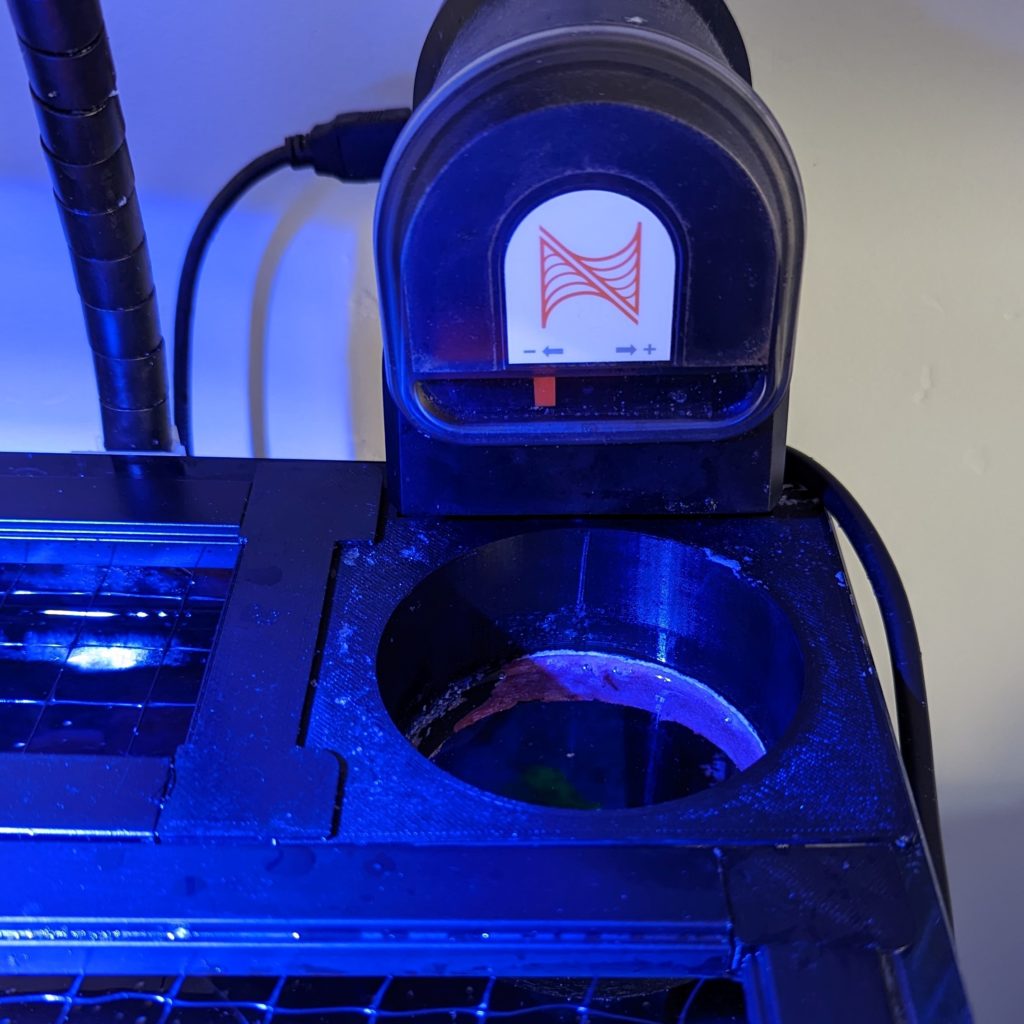
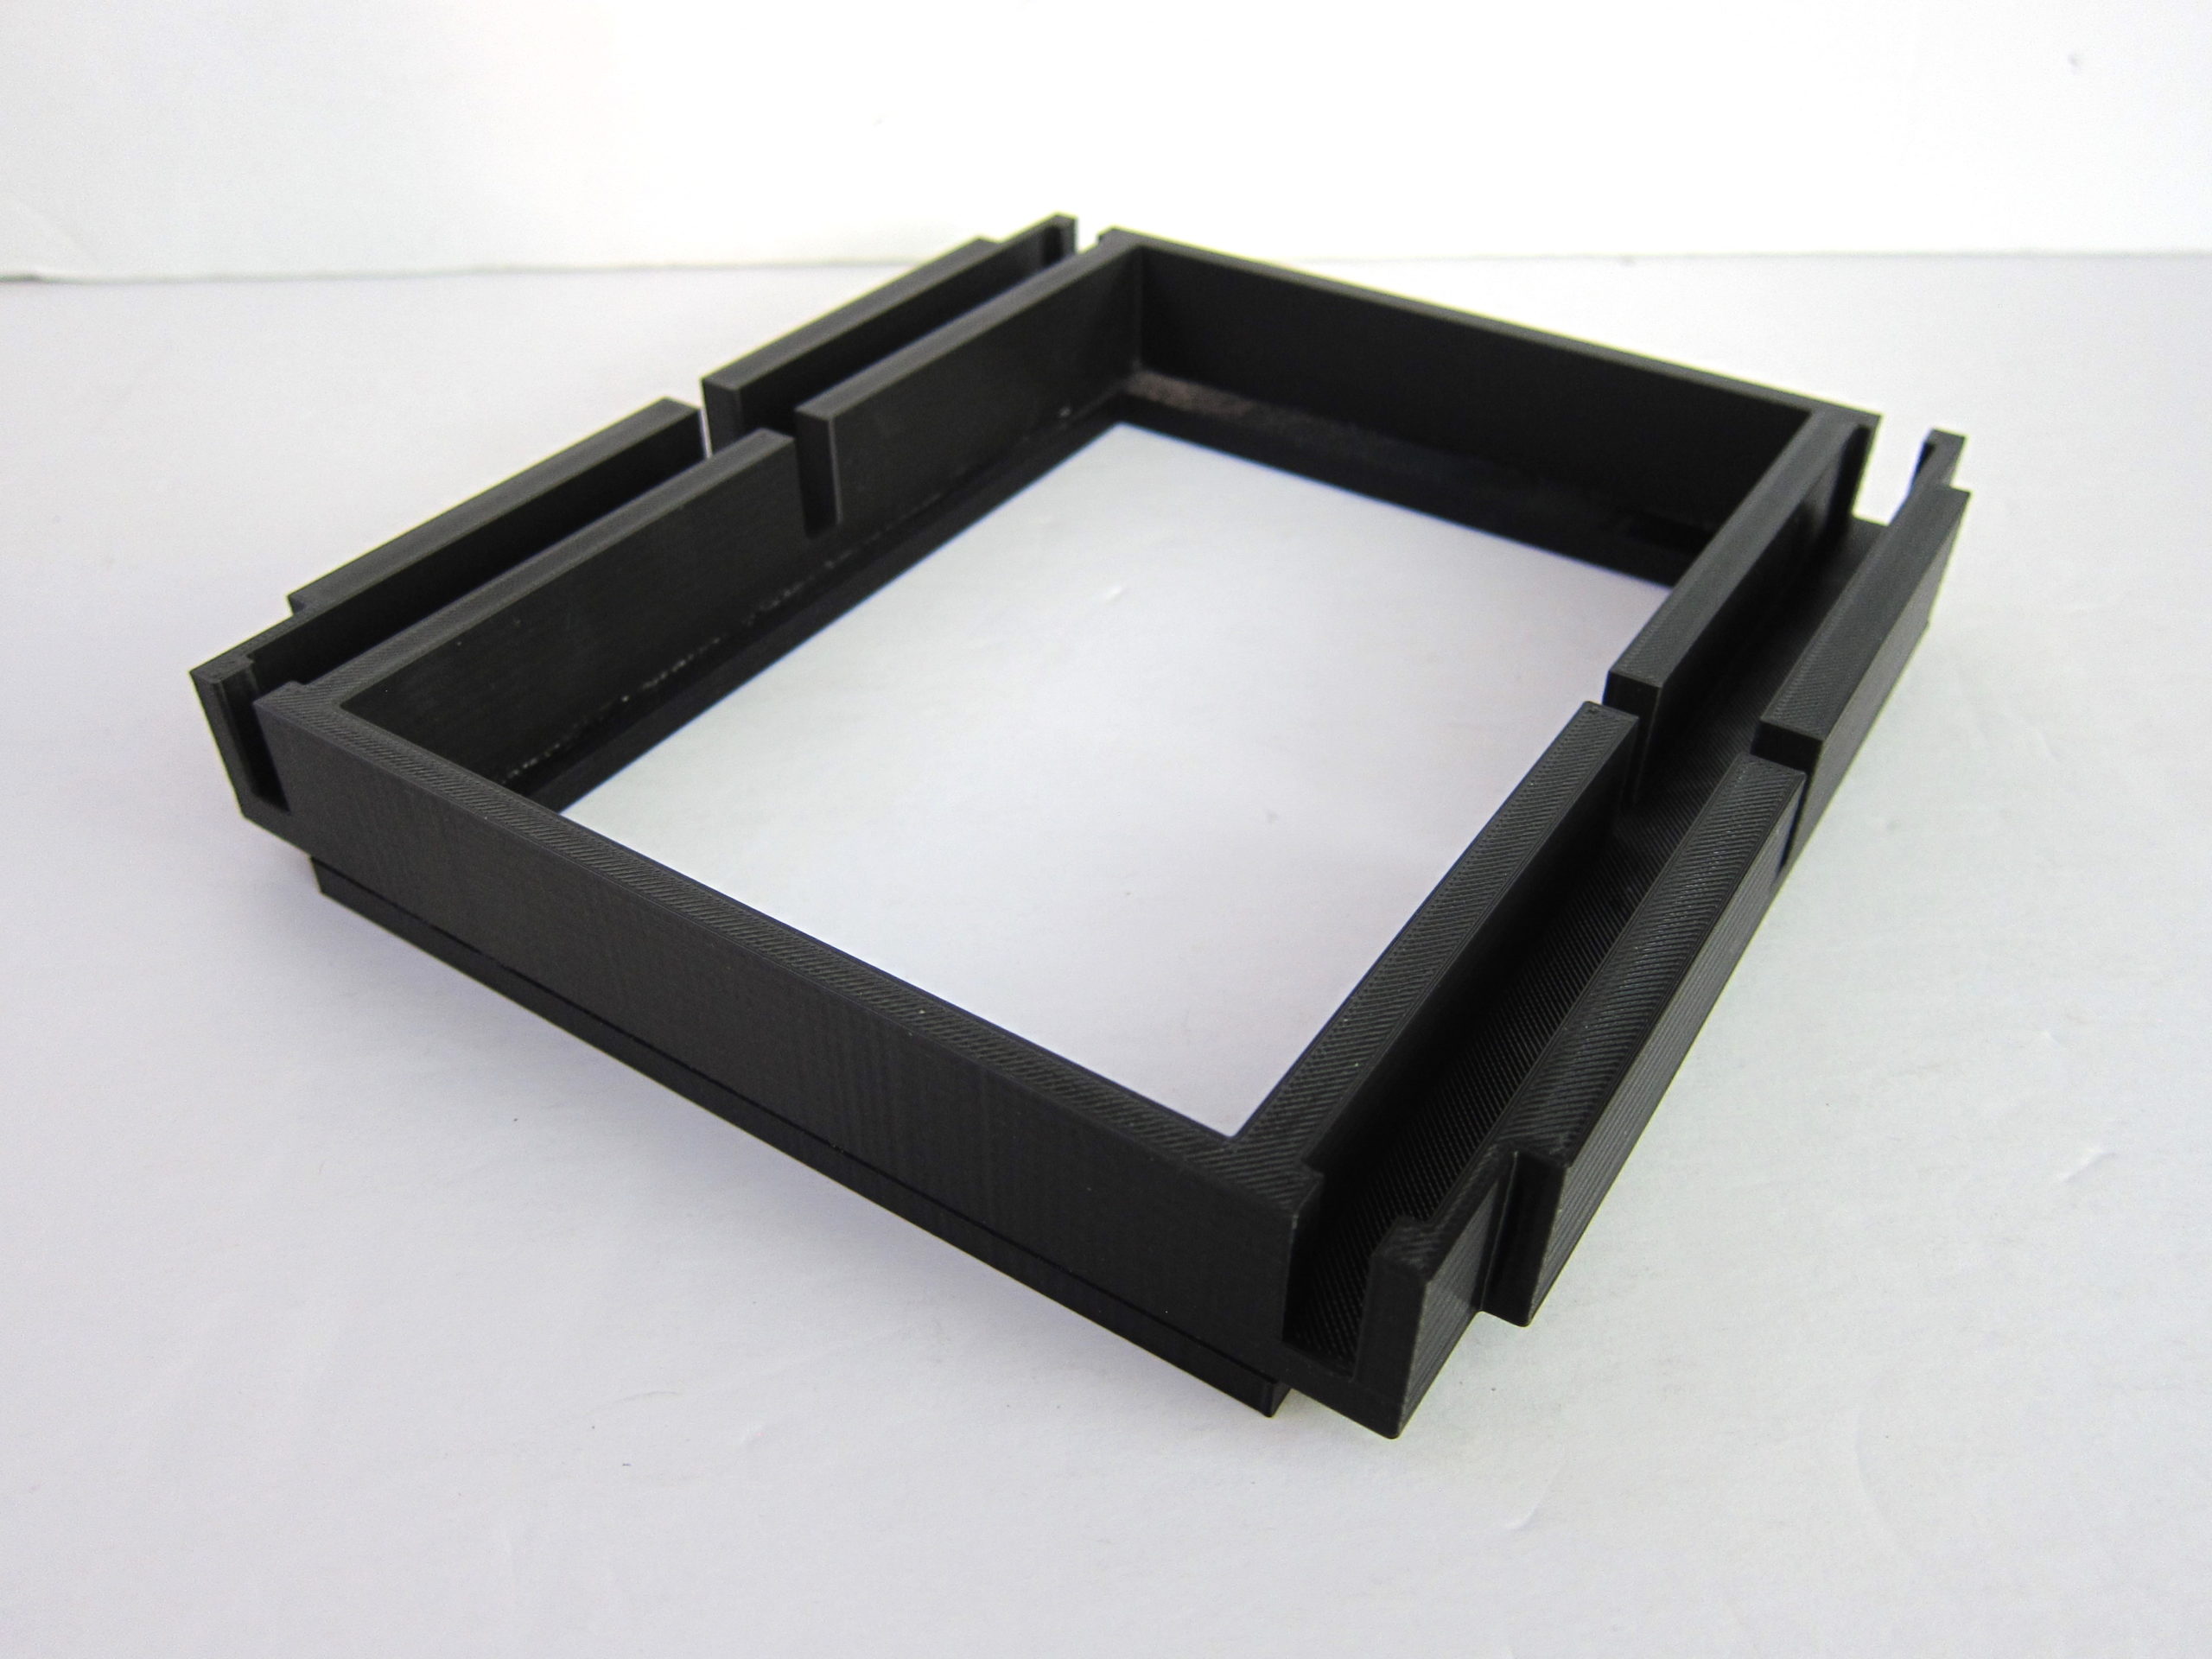
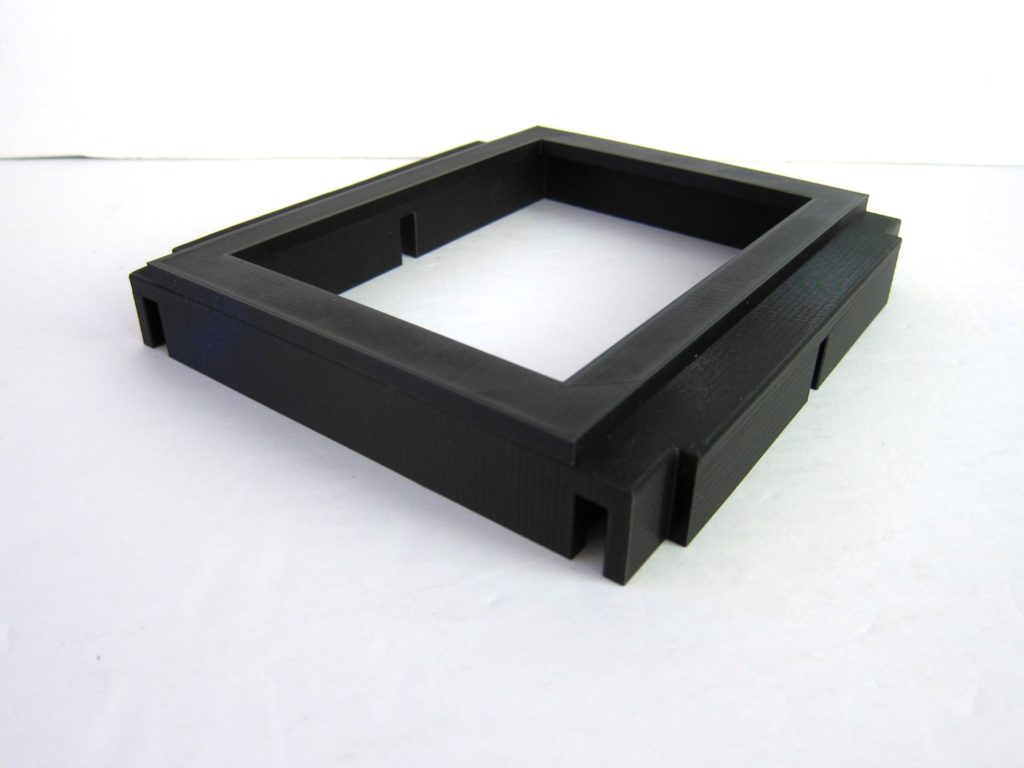
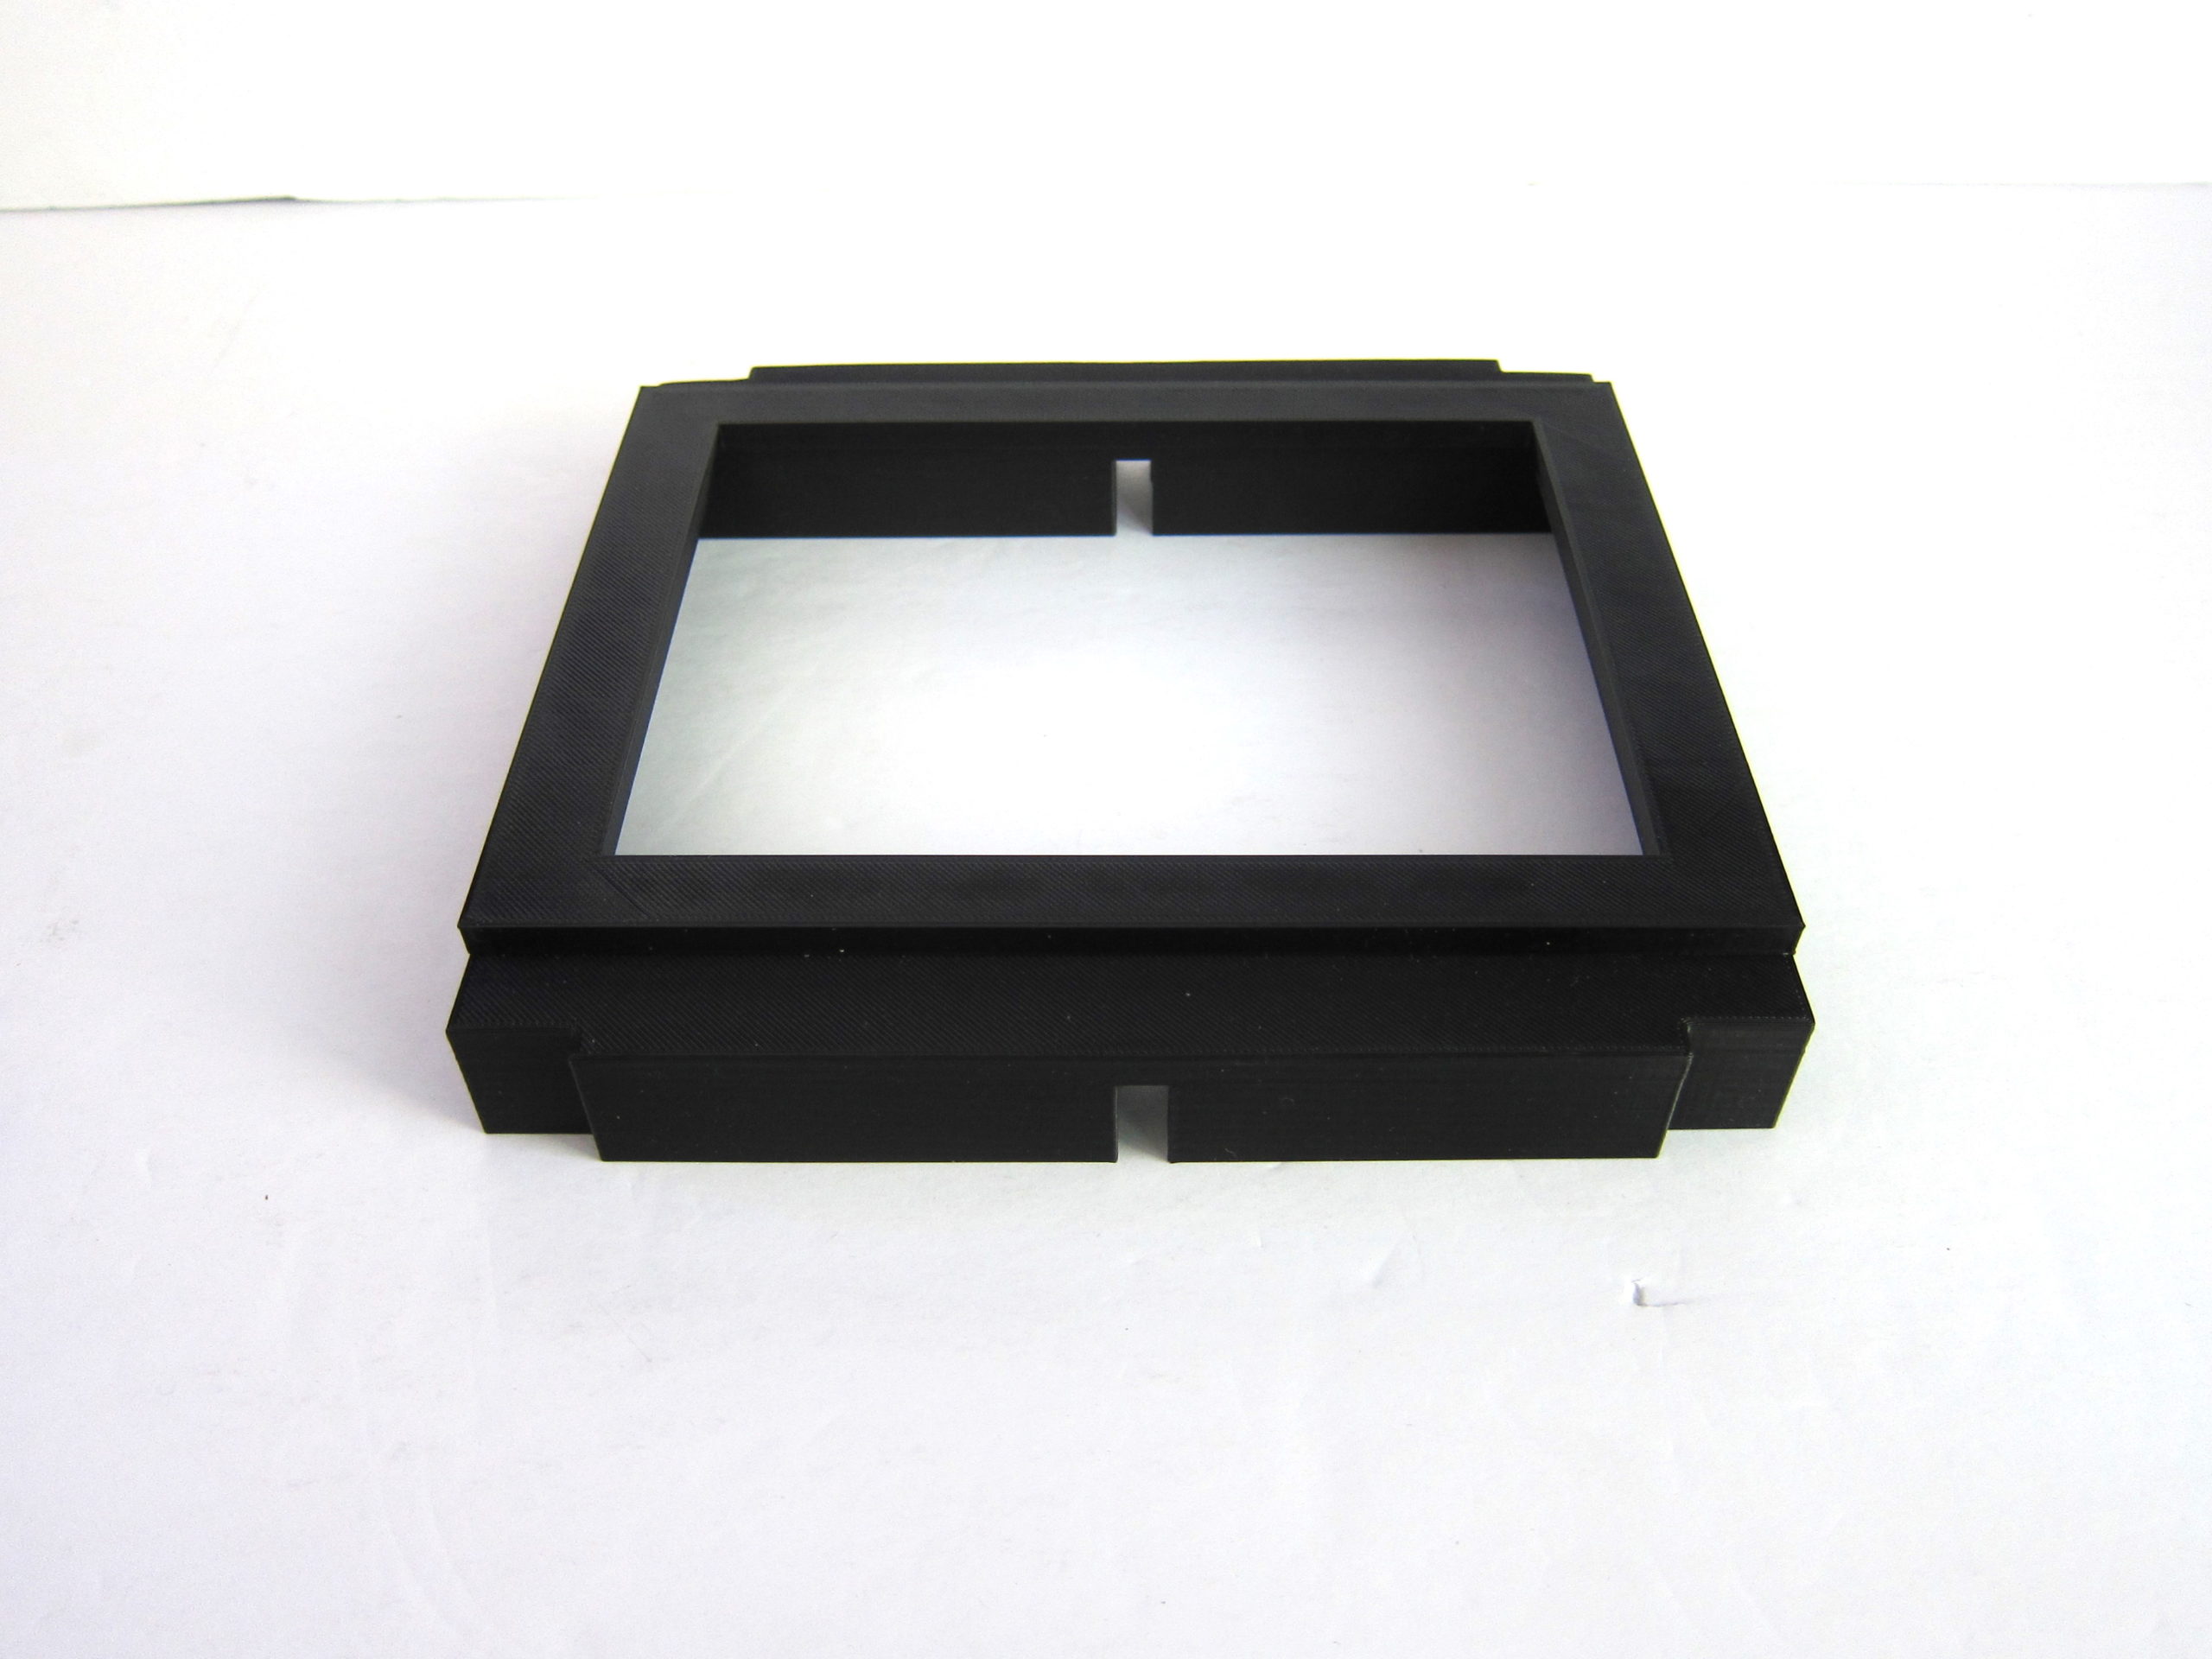
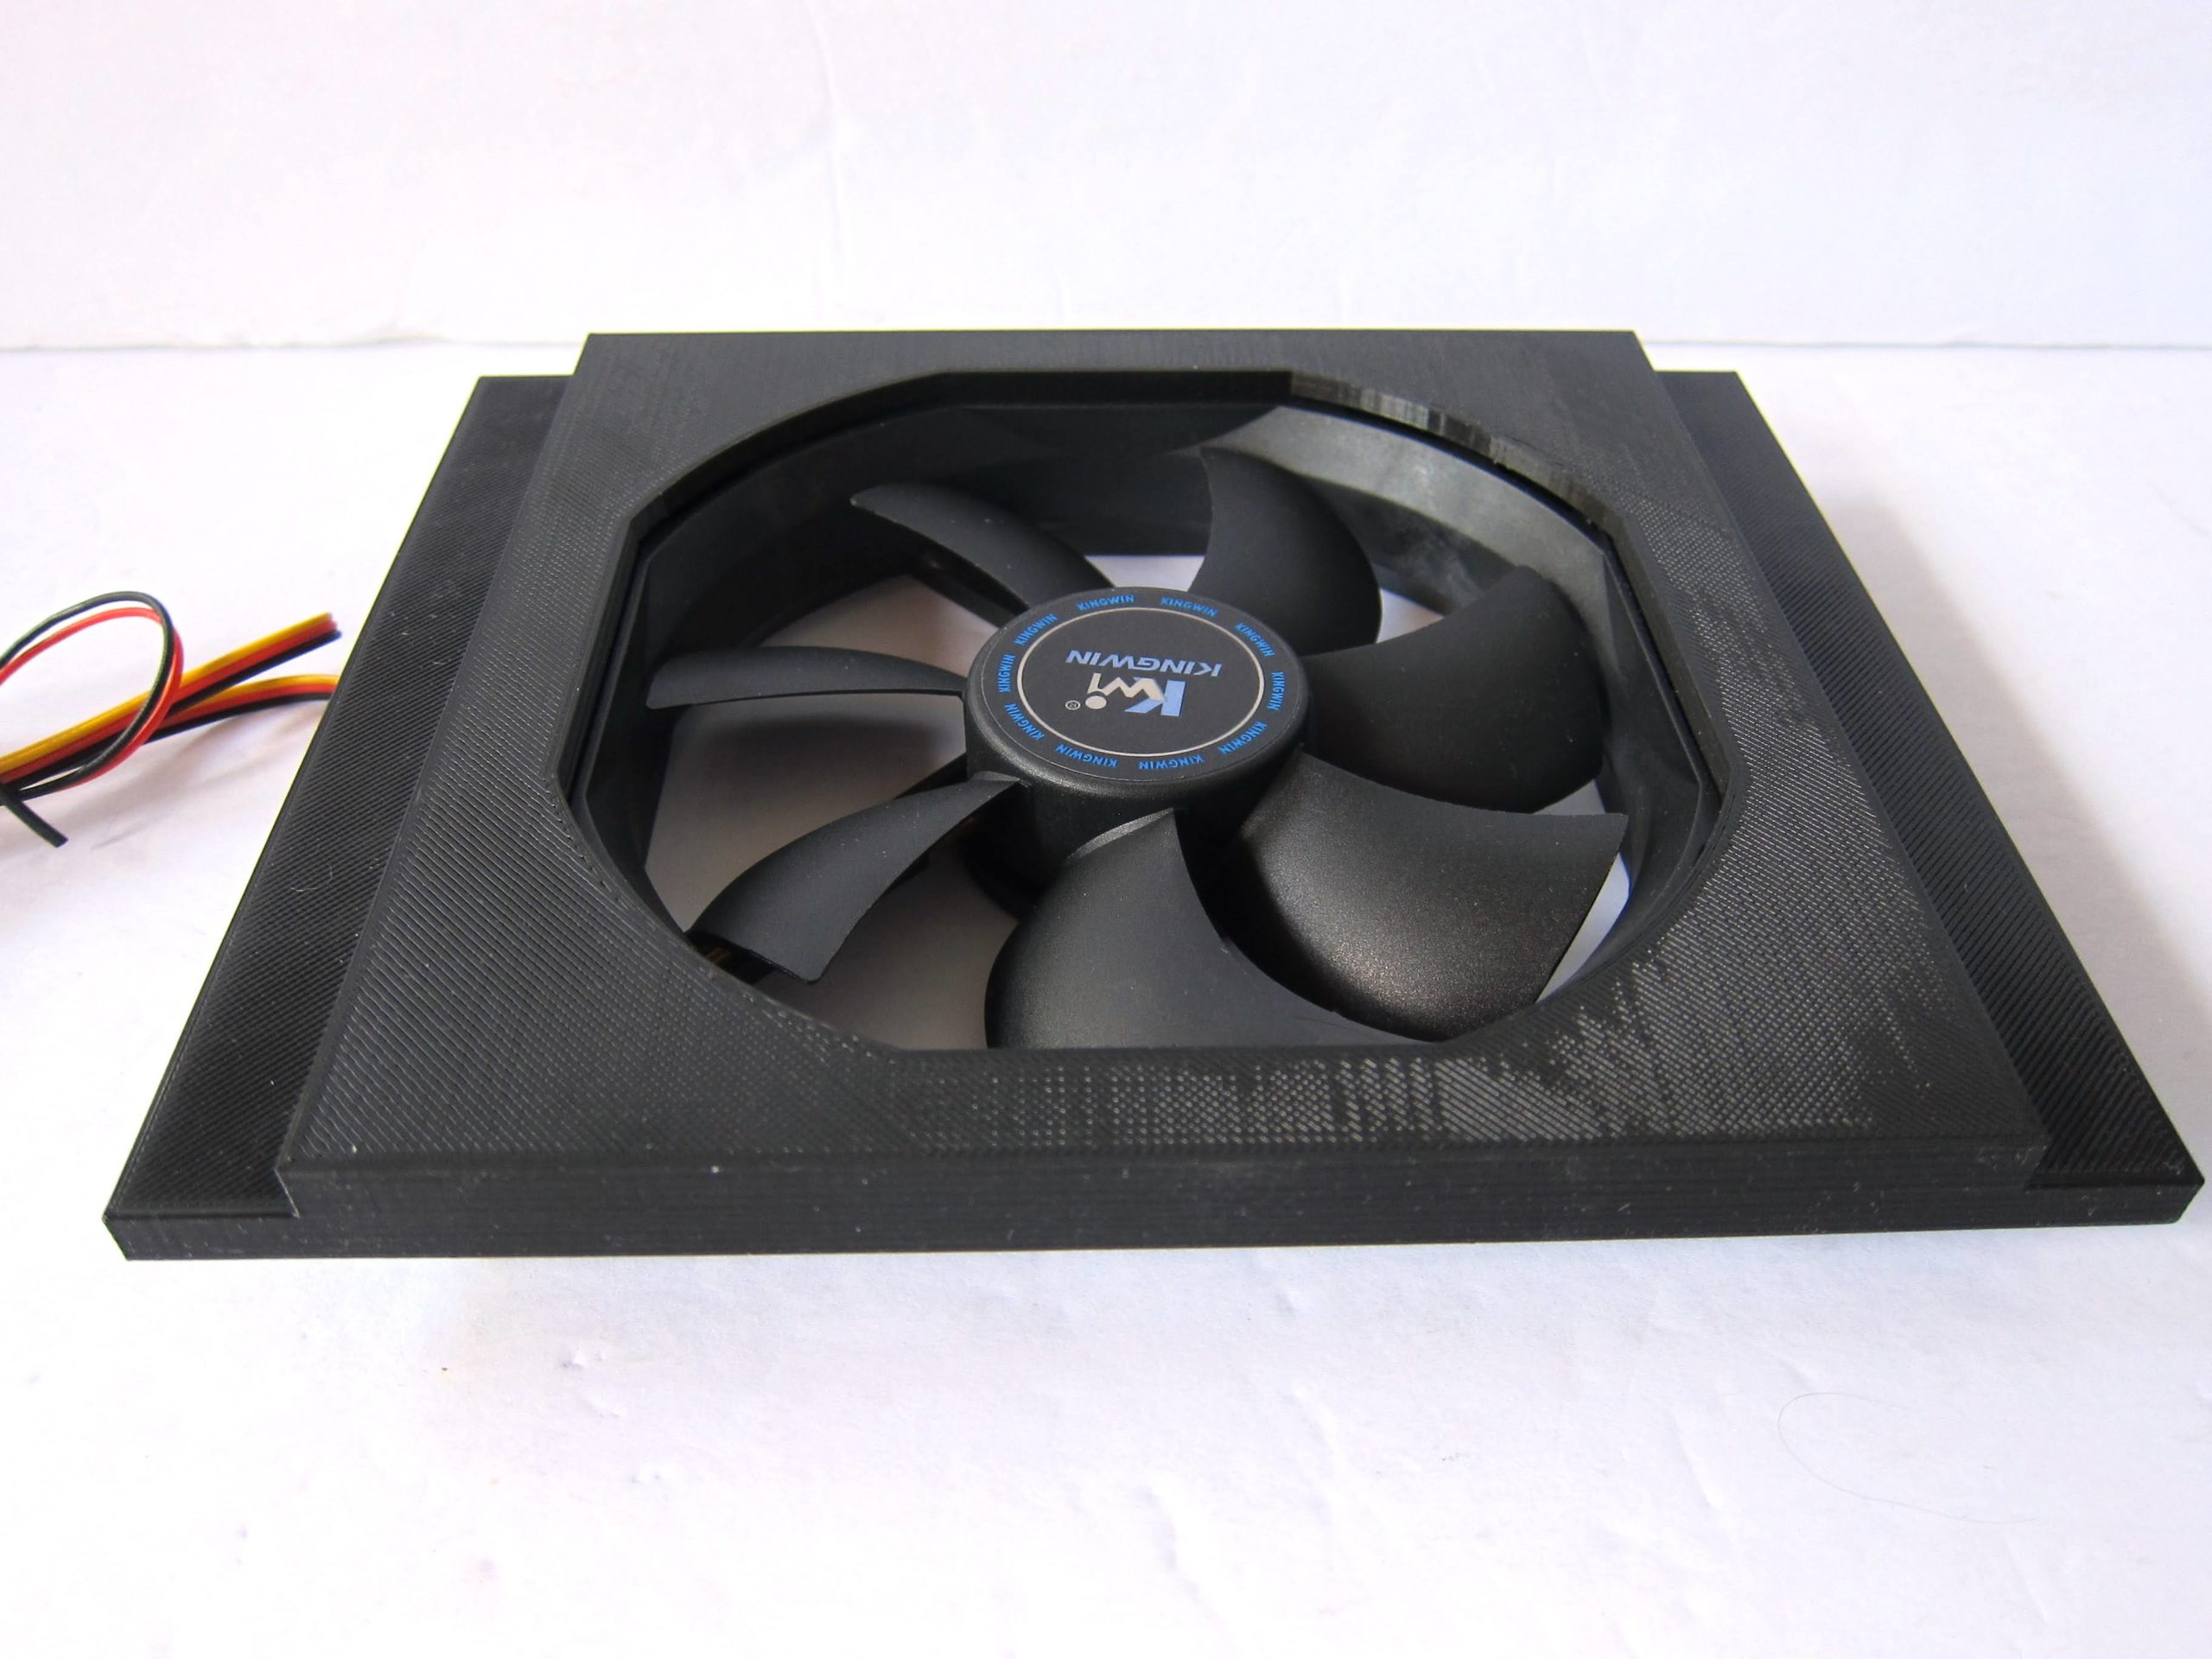
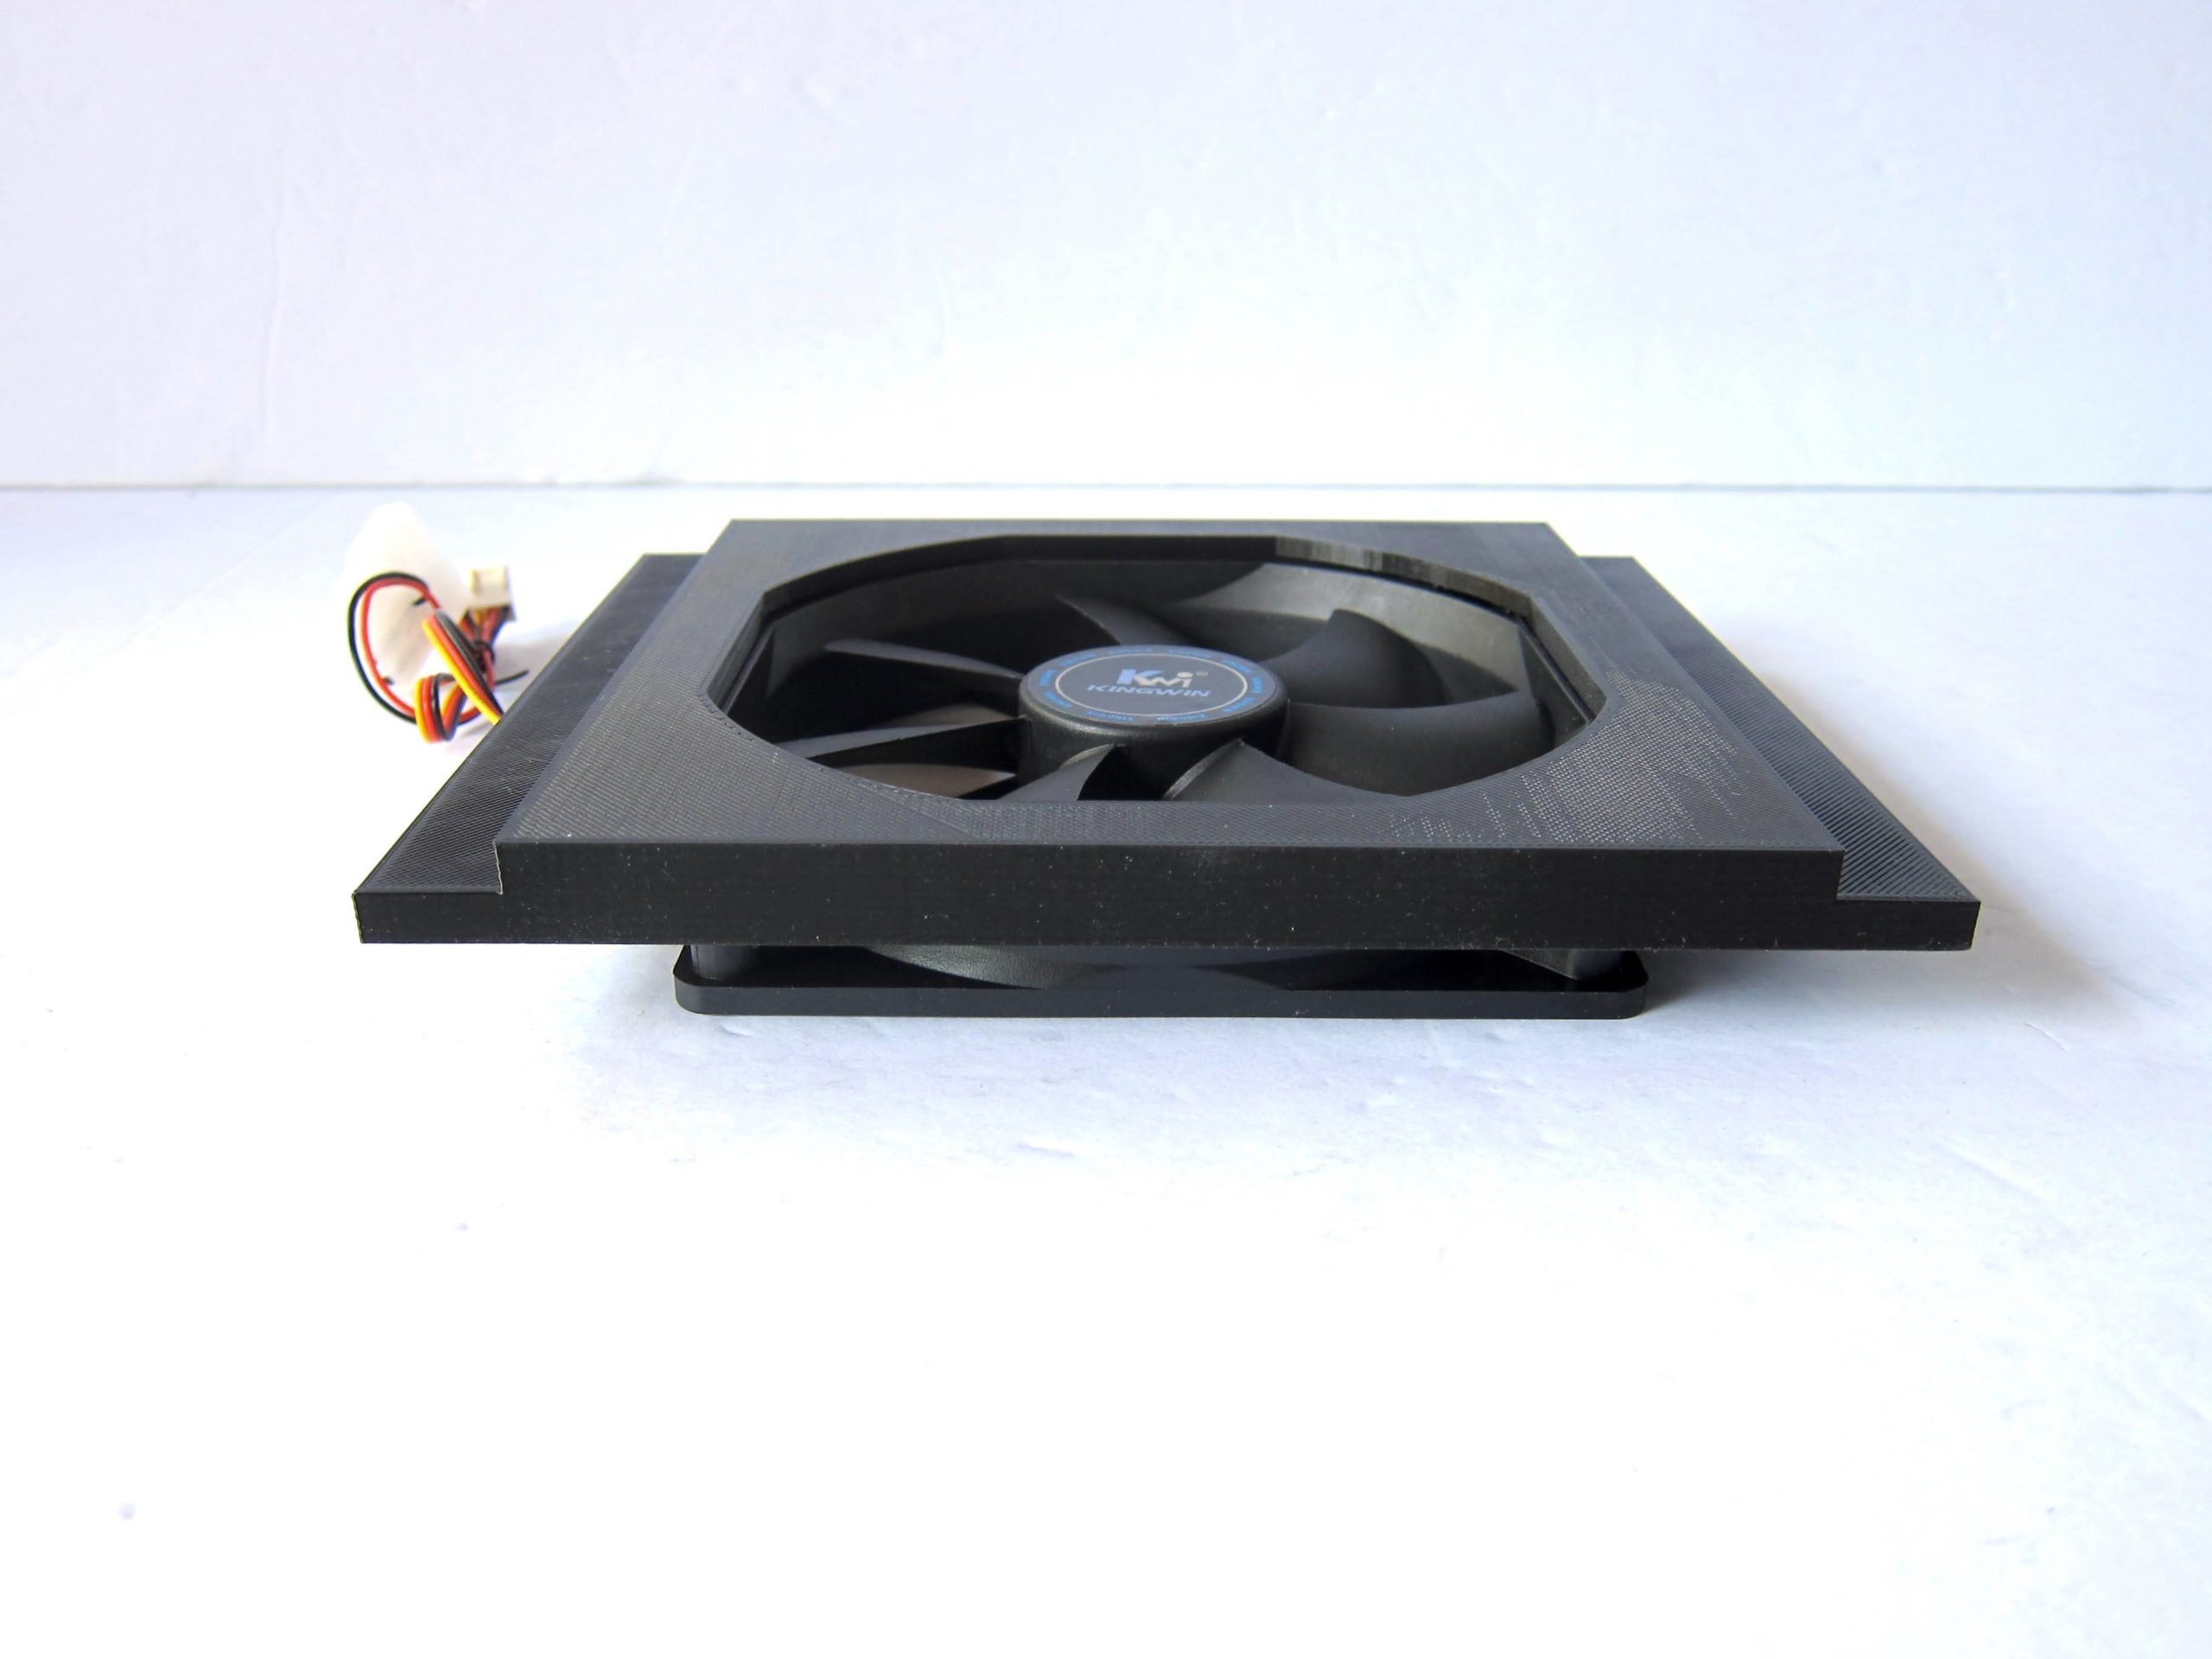
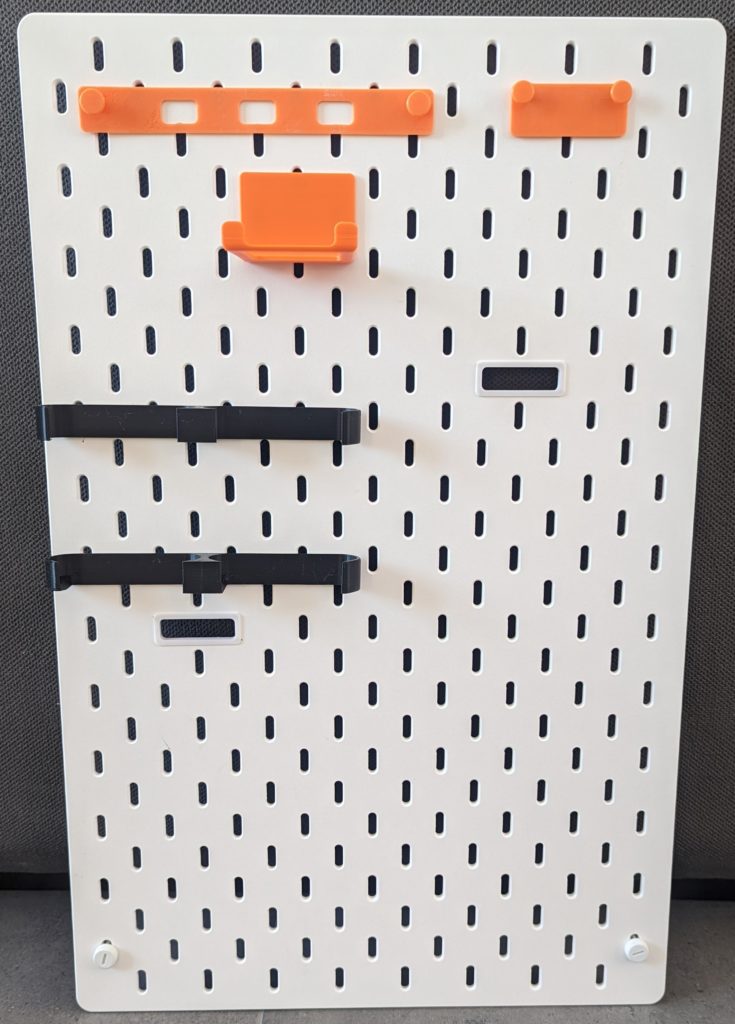
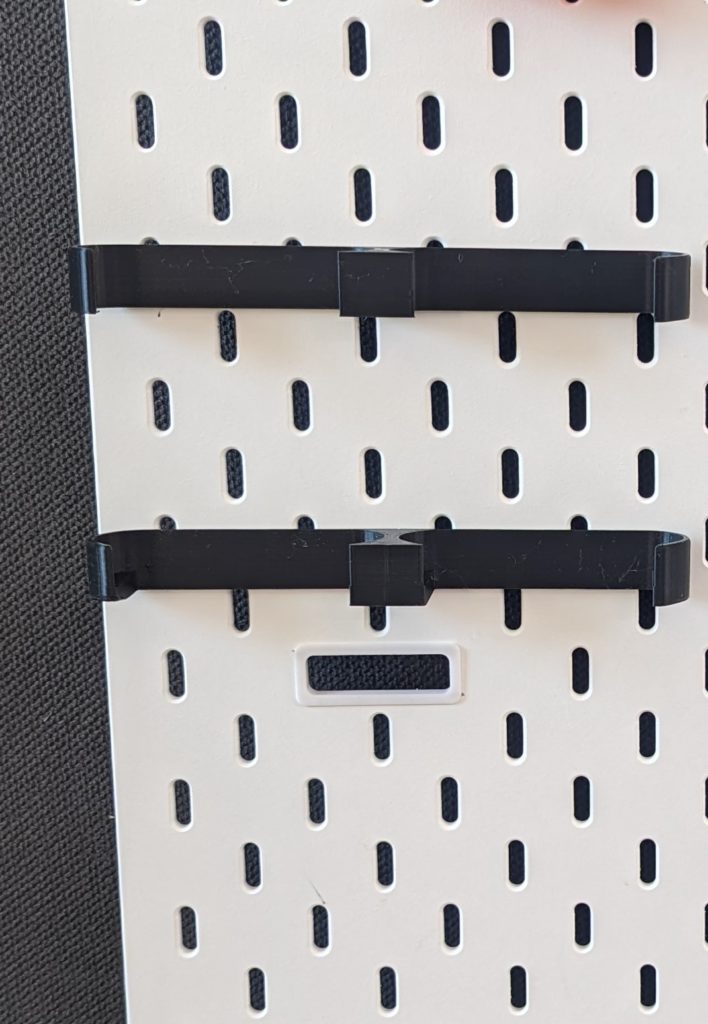
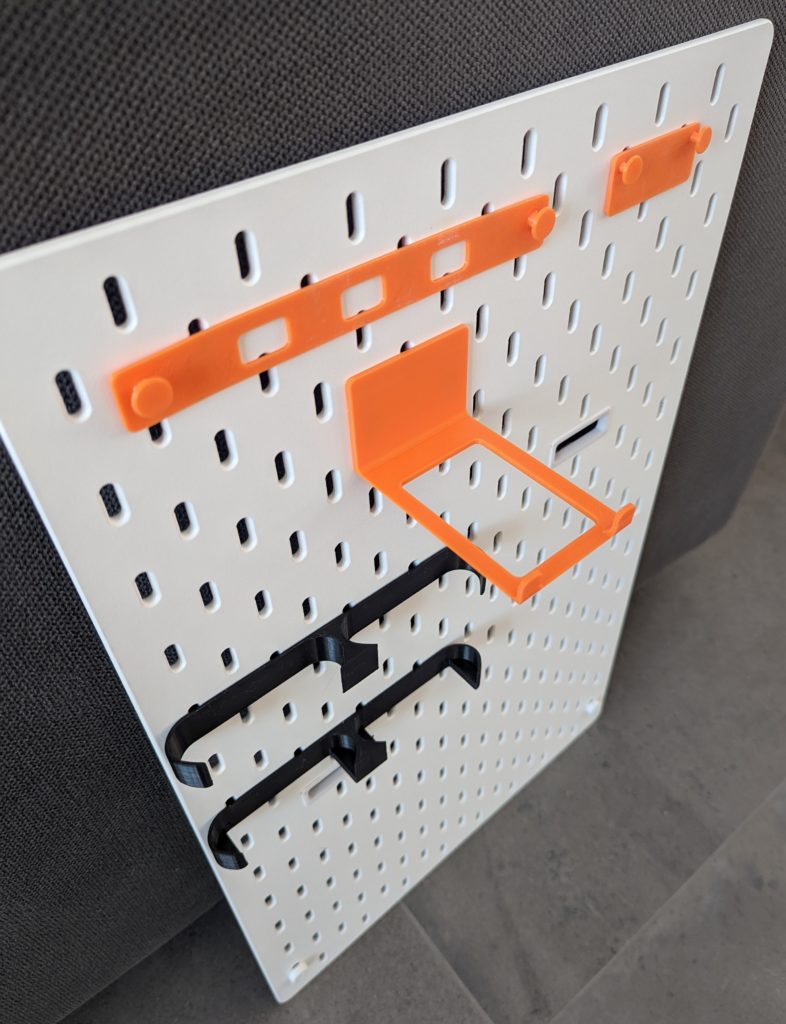
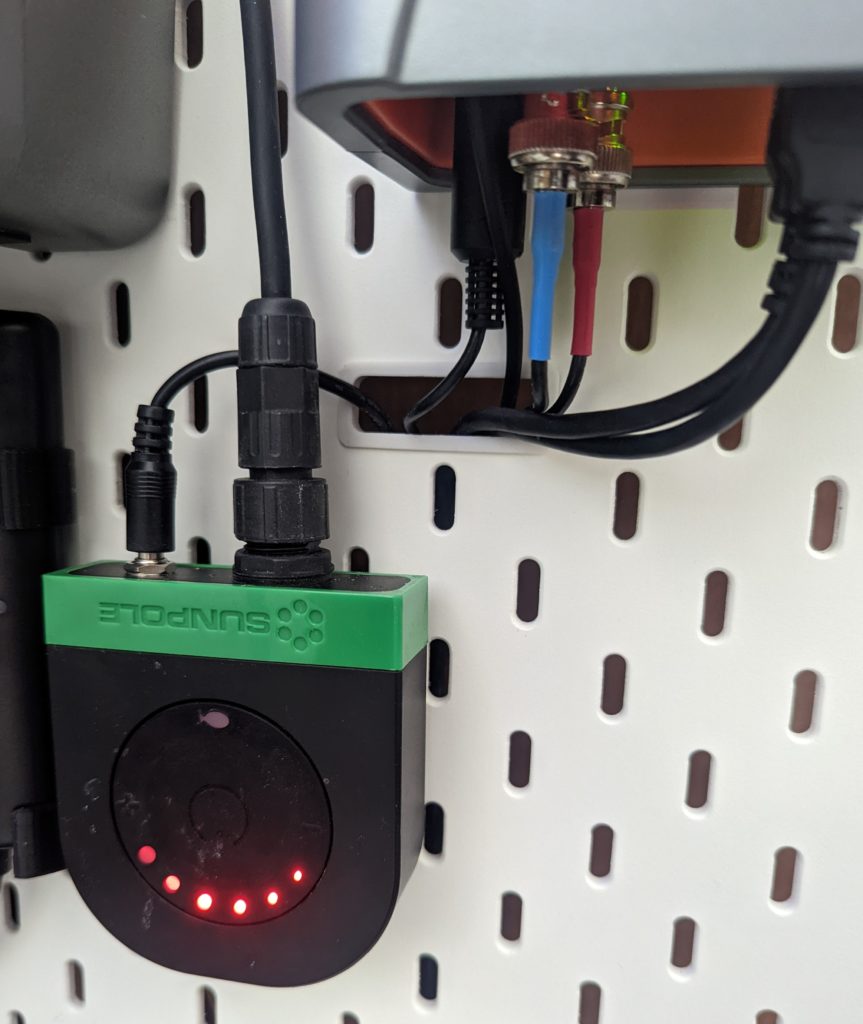
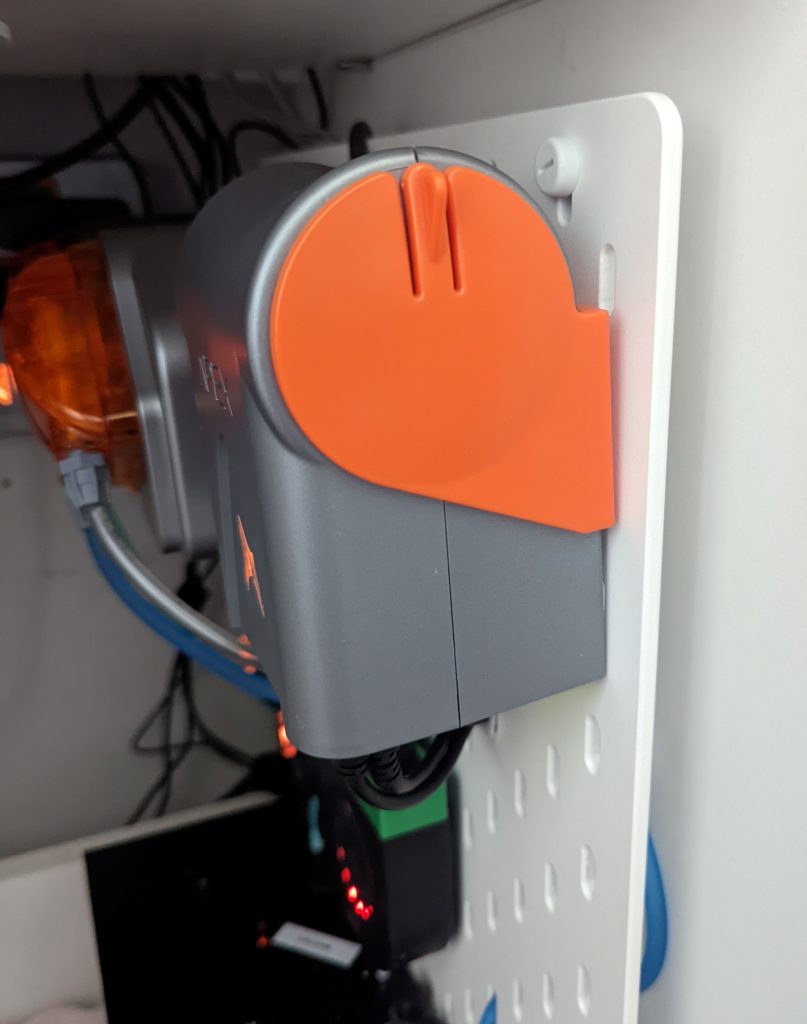
Luckily, this is exactly why we had gone into the 3D printing world! We have designed each mount to fit each controller exactly with no wiggling and with extra support. The only modifications that we did to this board was add cable holes. We didn’t want anything that stood out so we simply cut 2 horizontal lines that connected 2 holes. Tip: don’t glue in the cable grommet right away (or at all!). This allows more flexibility to squeeze in slightly larger connectors. Check it out for yourself.

Like we mentioned, we do still have an aversion to putting permanent nail and screw holes in the cabinet. And like we have mentioned other posts, it should be no surprise that we used nano-tape instead to adhere the top bracket of the peg board to the cabinet.

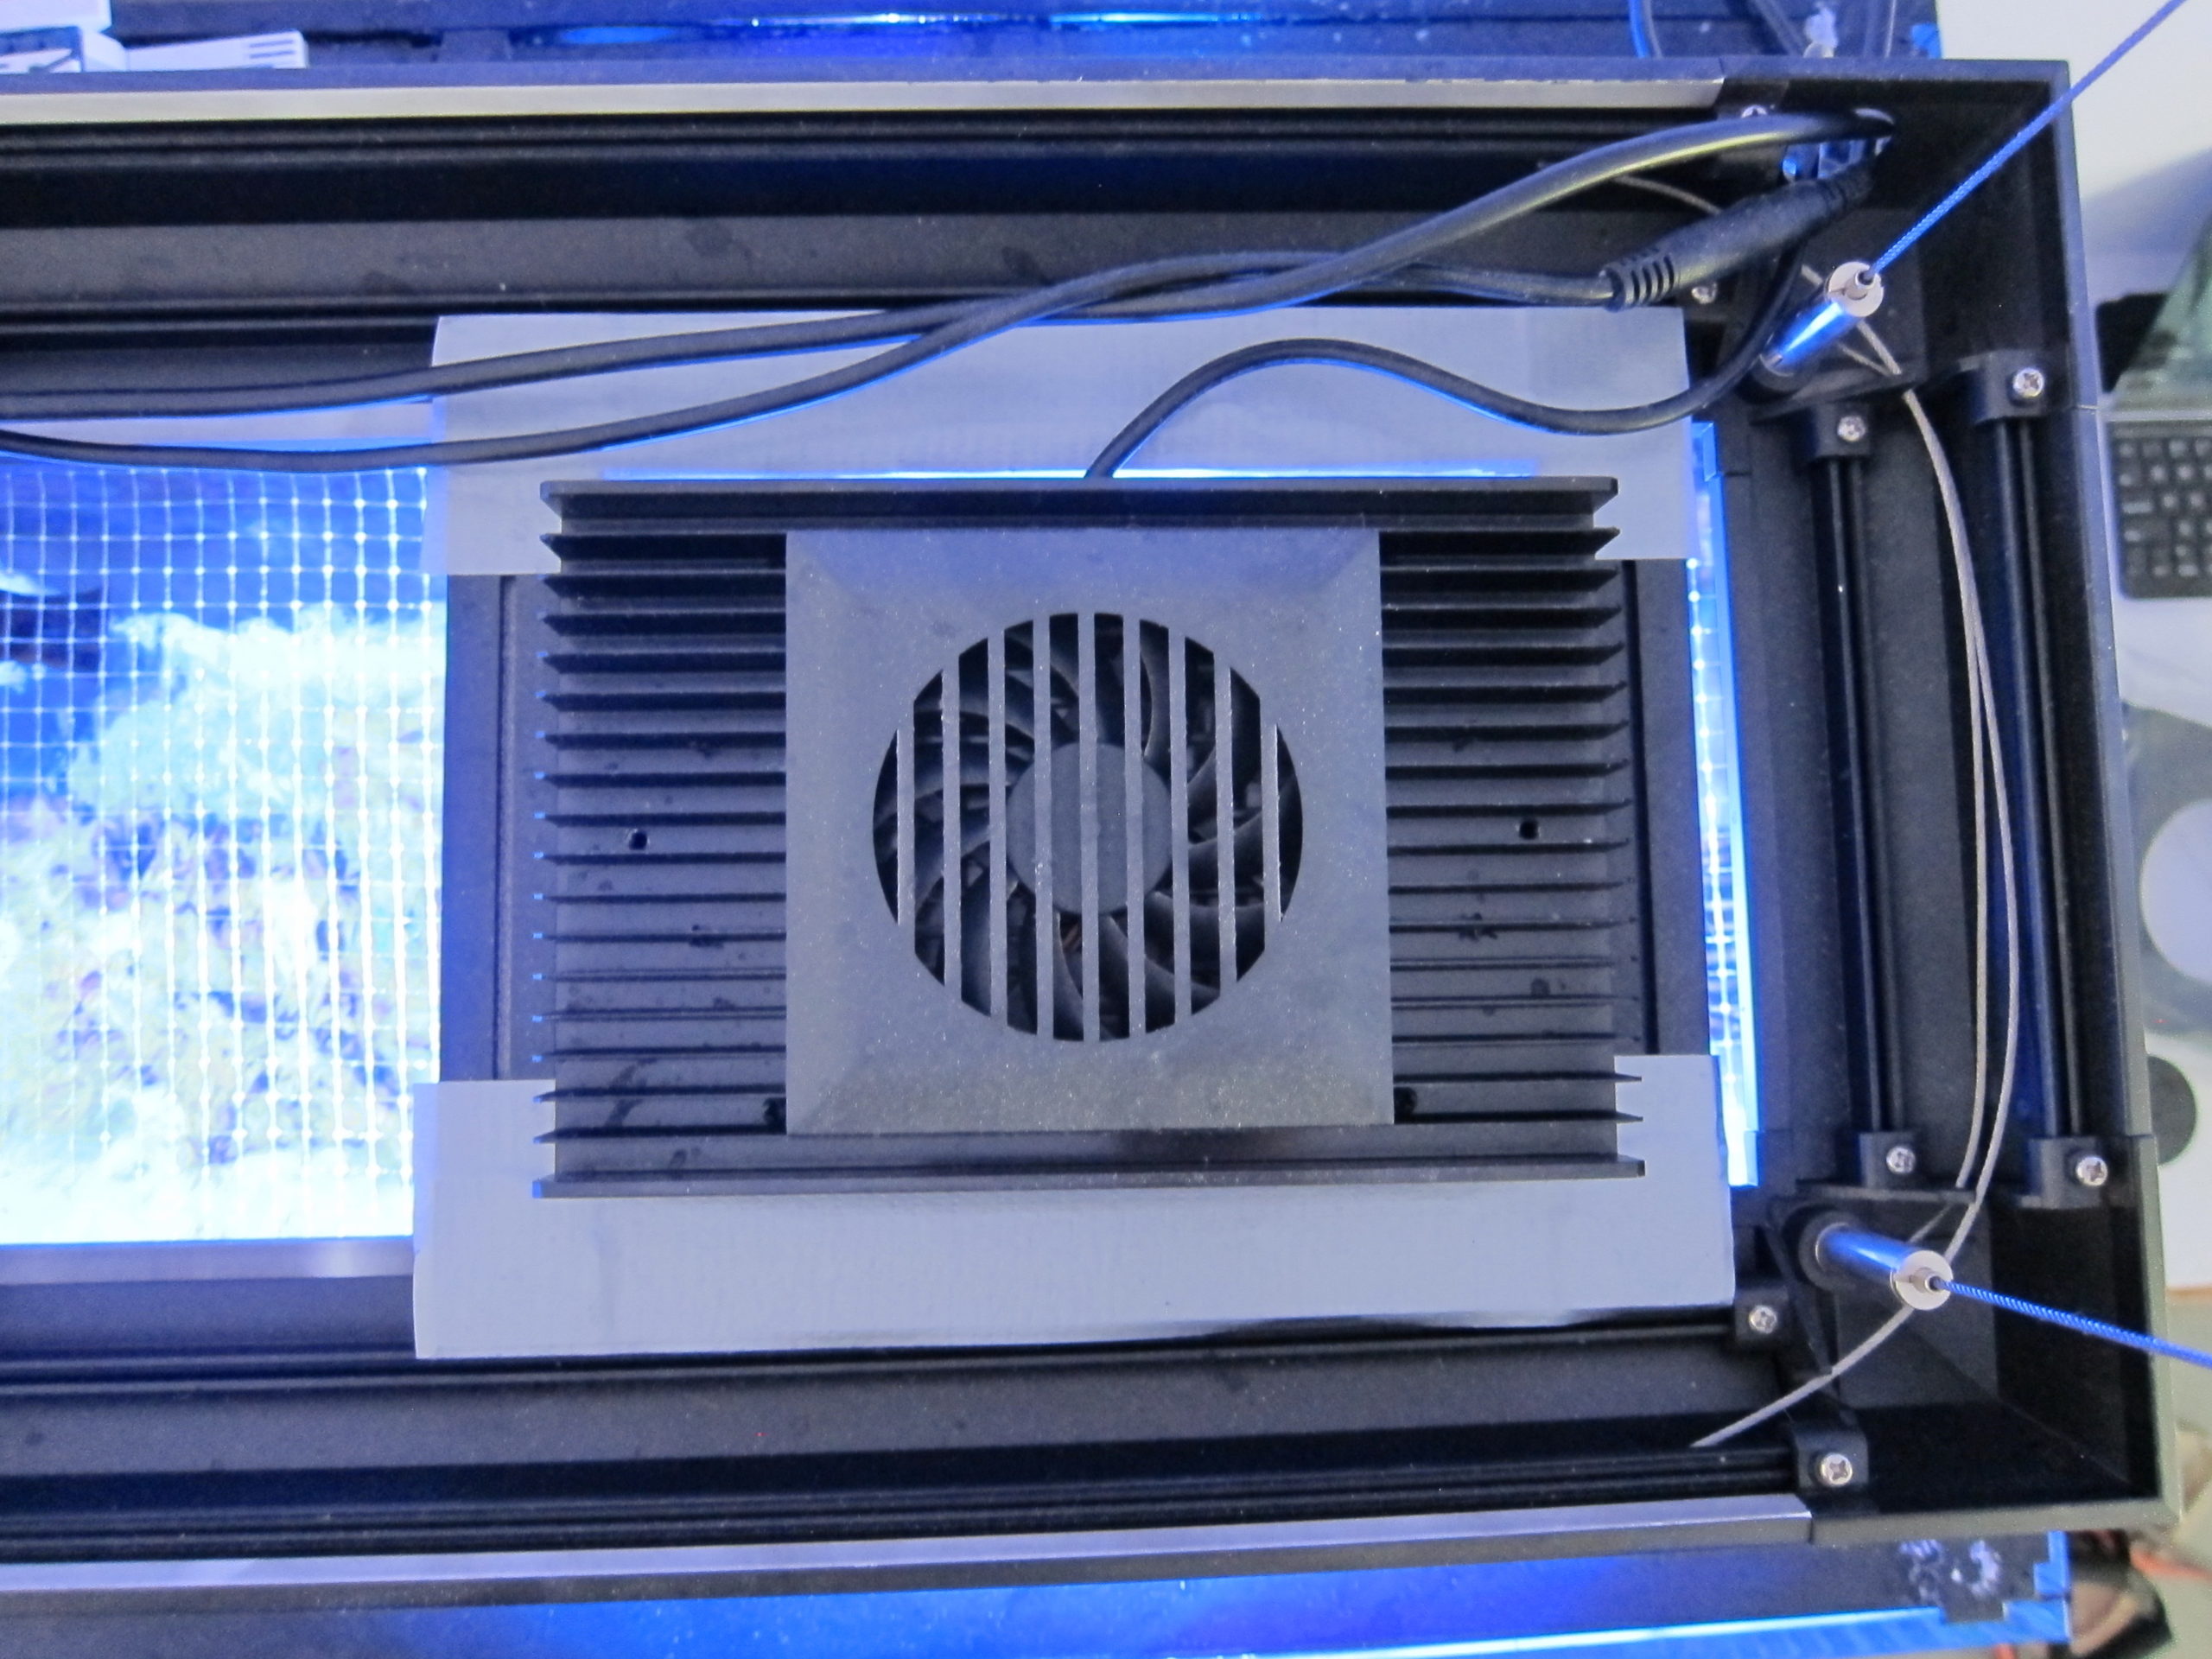
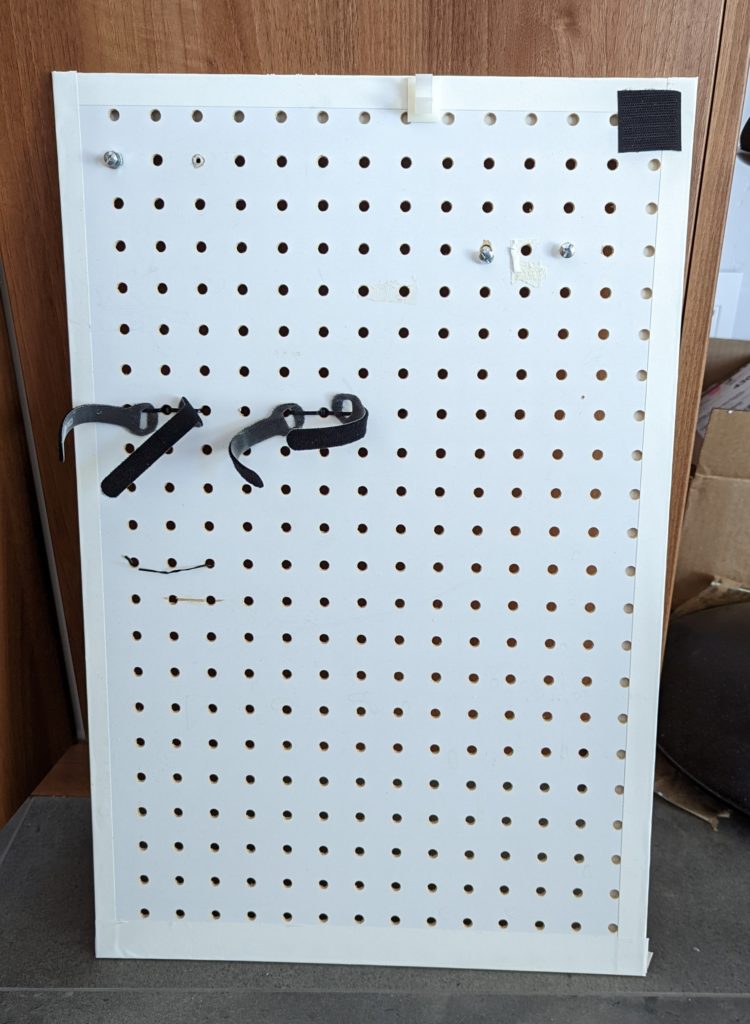
Anyone want to see the back side? Here it is!

If we had more patience, we probably would have ordered and waited to use these cable clips. All we had on hand were the medium white clips, which were just the right clearance anyway.

Luckily, another great feature to this peg board is how easy it is to remove and access the back side. There are no screws on the bottom – just stand-offs. At the top there are two screws that connect to the bracket. Remove those 2 screws and the entire board comes out. So when the new clips come, it will be Super Simple to install them.

We hope this helps brings some organizational relief (at an affordable price) to some of you as it did for us! Now we will be proud to show off “that” side of the cabinet. Let us know how your DIY turns out! Happy Reefing and remember to keep it Super Simple.

Categories
General

Aquarium Covers.

Rimless tanks… to cover or not to cover…

So you bought a beautiful rimless aquarium because after perusing LFS after LFS you just loved how awesome their show tanks look. 6 months into the hobby you have a few fish that you adore and everything is going swimmingly (pun intended). You wake up one morning and you see one of your FAVORITE fish flopping on the floor. Your heart stops and you stop breathing, you rescue Mr. Clown, and you immediately start researching online for creative, attractive, aquarium tops to hopefully prevent this from EVER happening again. And now you are reading this.

So what are your options? Here are 4 of them and yes, we’ve tried them all:

  • Glass or Acrylic cover
  • Custom designed and cut polycarbonate tops
  • DIY screen mesh cover – pre-made kits
  • DIY screen mesh cover – really DIY

What we learned: Glass or Acrylic cover

Our first tank was a 45 gallon acrylic tank. It was euro-braced and Mr and Mrs Clown were the first fish in the tank. After the incident, our inexperienced selves thought an acrylic top would match and look good. 12 years ago, option 2 was not around (as far as we were aware). We thought we were clever and segmented the top into three different pieces, front to back, for easier access when needed. We used 1/4″ acrylic because we were worried about light penetration. What we didn’t know was that acrylic warps – easily… and even easier under heat from the light.

We changed it out to 3/8″ acrylic. The same thing would happen. It would still warp, but slower, and we got into the habit of flipping over the tops with every water change. Ironically, it was good because it made us clean off the salt creep and condensation which helped with lighting.

Eventually we switched the back two panels to glass and kept the front panel acrylic – didn’t want to accidentally drop it on a bad day. I’m sure you can guess what happened. Yep, the glass panels never got cleaned =). So overall, not a bad look, but there are some maintenance challenges that definitely do not fit our mantra of super simple.

What we learned: Custom designed and cut polycarbonate tops

Fast forward 5 years – welcome Red Sea Reefer 350. Yes, it’s a rimless and yes, we bought it knowing that we would be wanting/needing a top.

Around this time, the polycarbonate tops were all the rage. Going this route comes with pressures of selecting lighting, having cord management plans, and having auto fish feeder integration plans. A $400 top was not something for us to take lightly.

To further mitigate risk, we went with a model that was marketed as modular. Unfortunately, the top didn’t last very long. (This post will not focus on the quality or construction of our particular vendor.) We didn’t pursue another top manufacturer because after using it for just 2 months, we could see that the polycarbonate custom top route would not be a long term solution for us. Being custom, it was too limiting and cost prohibitive. The clear polycarbonate also didn’t gave us the look we thought it would. Instead of accentuating the look of the rimless tank by fading into the background, it would actually stand out and “glow” because of the reflection from the lights – definitely a great show piece though. Additionally, the top was heavy and sagged. It was challenging to access the tank when we needed too. For these reasons, we decided to pursue DIY options.

What we learned: DIY screen mesh cover – pre-made kits

Pre-made kits can be a easy solution for the right setup. Everything is already cut to size so you know it will fit your tank – particularly if you use the same manufacturer.

Red Sea DIY Aquarium Net Cover:

Red Sea is one of the biggest names out there with a large aquarium market share. For that reason, this may make sense for many reefers. It would be guaranteed to fit a Red Sea tank.

Pros:

  • Options to purchase more cut-out and zig-zag pieces if needed
  • Tops will sit below the rim line

Cons:

  • Basic 48″ kit starting at $69.99 and cut-outs starting at $10 a piece if you want to modify anything
  • Proprietary sizing – the corner pieces will only fit Red Sea frames
  • The design of the clips is not our preference. Due to the location of the clips, they seem to stand out more than they need to in our opinion

Innovative Marine DIY SafeScreen Mesh Screen Kit:

The Innovative Marine system is currently on our tank. Since going to a pendant lighting system with MP40s, we didn’t need the flexibility of cut-outs or cord management. We enjoy the pros below and have designed the top in 3 pieces to accommodate the lack of cut-out options. Of course, we also used our own AFS Tube design for a seamless integration with the top.

Pros:

  • Thicker rails, which provide more durability
  • Tops will sit below the rim line
  • Bi-wing corners hold the top in place – no additional clips needed though available
  • Pop-off corners for cord management option

Cons:

  • Cheaper than Red Sea, with a 48″ kit starting at $59.99, but just a basic rectangle top with no overflow cutouts
  • Difficult to find/buy additional corner pieces with wings
  • Need to buy corner pieces ($10 for 4) to build overflow cutout
  • Not easy to integrate light mounting arms
Installed top shown used 3 IM kits and 1 3D printed AFS Tube

What we learned: DIY screen mesh cover – really DIY: ~$60 for 48″ top

Ultimately, we are really liking the aluminum rails look.  The black rails from Innovative Marine Kit match the black silicone very nicely.

Based on our experiences, we decided to design corners, adapters, and cut-outs to try to take a best of all the options for when we are ready to change it up again. We are also going to try a dark screen rather than the clear screen based on a recommendation.

Additionally, when going this route, consider spray painting the aluminum rails black as they usually only come in silver, dark bronze, or white. Below is a breakdown of everything you need and what the estimated cost may be.

We hope this helps you decide what will be best for you and your tank. Let us know how your DIY turns out! Happy Reefing and remember to keep it Super Simple.

4/22/2023 Update:

So it’s been a couple of years now…. corals are getting bigger and need more light! We upgraded to Kessils and were looking to reduce the thickness of the rails to let more light through.

So, we did everything that we recommended….

  • We replicated the same 3 pieces with our own corner pieces
  • We upgraded from clear mesh to black mesh
  • Spray painted 3/4″ window screen rails to black w/ clear coat
  • Used 1/2″ mesh to let in more light – smallest fish is six-line

Needless to say, we are thrilled with the look! Please judge for yourself!

If you would like to replicate this look, check out the ‘Reefer 350 Pack’ in our DIY section
Categories
General

Twin-tub Portable Washing Machine

Keep your aquarium laundry separate from home laundry and potential outside contaminants!

We love this particular model because of the SEE-THRU body. This unit is just the right capacity to wash our larger towels for big cleaning days and the right speed and efficiency for dirty filter socks.

We also liked that the unit is made of sturdy high-density plastic with stainless steel drum. Feels built to last!

How did we pick this one:  We wanted a low profile, dependable, affordable machine that had a reasonable size and could take care of the washing and drying cycle. 

What we picked:  This is the Zeny washer with spin dry – twin tub washer and spinner with 9.9lb capacity.  It’s available on Amazon and Walmart for just over $100.

How to use it: Overall washing time takes about 15 minutes, with time to walk-away time and being able to clean other parts of the tank. 

Let’s walk you through how this works:

For people who have space, you can keep it hooked up to the sink or keep it stationary with an attachment.  For us, we keep this bucket near the kitchen sink to fill and drain. 

Steps: 

  1. Add the dirty filters to the washing tub and cover with water. Make sure the washer knob is set to “Standard” and not “Drain” from the last washing.
  2. Add a small amount of detergent– a tablespoon is more than enough.
  3. Run the washer for 12 minutes.
  4. Transfer filters to the dryer, drop the exit hose into the bucket and switch the washer to “Drain”. We use this perfectly sized baby teether to hold the hose in place when it’s draining. Run the dryer for 1.5 minutes.
  5. Switch the washer back to “Standard” and re-add the dried filters to the wash. This is essentially a rinse cycle to wash off any leftover soap.
  6. Repeat steps 2-4.

Note, there’s a filter on the in the wash tub that captures lint as the water is swirling back and forth.

When drying, if you notice a lot of vibration, it’s because the contents are unbalanced. Stop the dryer by lifting the cover and even out the filters so that it’s more balanced. Using the circular disc is helpful, too, for pushing the filters flat.

If you notice that water collects in the hose, raise the washing machine. We have it sitting on a rolling cart that elevates the hose outlet above the bucket, which causes it to drain completely every time.

Categories
General

Filter Cups.

Our little helpers. Even compared to skimmers, filter floss cups are probably one of the least glamourous part of our tank. At least skimmers come with different features, different capacities, different shapes. The recent trend of automatic roll filters have put these guys even further down the list!

Well, we have tried some different methods and have even gone back and forth a few times. Much like our lights, this final configuration is on brand with super simple so it looks like it’s here to stay – at least for now =).

The Red Sea Reefer series, as some of you already know, has this “feature” in that it doesn’t fit the off-label 4″ filter sock/media cup sizes. You MUST buy on label or modify or source a custom maker. We COULD complain, but then we would have missed out the challenge to find the super simple solution.

What we learned: filter socks

Filter socks are great…. with some investment and some work. 100-200um filter socks come in around $4-5 a piece for the off labels. As we talked about before, we needed to modify them to get them to fit in our Red Sea trays. Once installed, time to clog (TTC) was about 4-5 days. We chose to hand wash them until we found this amazing small, portable washer unit. We just didn’t feel comfortable throwing the socks in our home laundry machine for many reasons, but mainly cross contamination.

We were tossing and replacing these socks every 2 months or so. After a while, we just got sick of washing the socks and they were more expensive than we wanted to spend for recurring maintenance.

What we learned: mesh socks

On one of the posts on reef2reef.com, someone mentioned that they used 50-100 um MESH filter socks and they were so much easier to wash. Why didn’t we think of that?! It was brilliant and we really liked it for a long time. We even ponied up and bought the on brand socks (Red Sea 4″ mesh socks) so we didn’t have to modify anything.

Time to clog (TTC) was about a week. We were tossing and replacing them every few months after washing couldn’t keep them unclogged. But like all tank related things, we thought – could we do better?

What we learned: Red Sea filter media cups + filter floss

Ok. No more washing socks. We were done. We looked into the auto-rollers but permanent modification of our sump wasn’t in our wheel house and wasn’t something we wanted to do. Our only choice left was no mechanical filtration or filter floss.

Since the reefer does not come with a filter floss tray, it was going to be filter floss media cups. Again, we went with on brand since we didn’t want to modify anything.

4″ diameter, 8″ height
media on bottom + floss on top

We tried different iterations to try to reduce the number of times we needed to change out the floss:

  • All floss – needed a lot of floss to cover all of the holes in the cup; didn’t really change TTC
  • Bottom media + top floss – helped with reducing how much floss we had to use, but media would need to be rinsed A LOT.

With the iterations above, we missed the common sense piece (why TTC on socks lasted longer than floss) – as long as we weren’t increasing the surface area of water passing through the floss, regardless of how many layers we tried, the time to clog (TTC) was going to be the same. Duh.

What we learned: Our filter cups + filter floss

We like the filter floss way. As a friend said to me: “There’s something satisfying about putting in pure white filters in place of gunked up green ones.”

This leads us to our filter cup design and how it affects our tank set-up and maintenance. Our considerations:

  • Modifying the sump to increase flow surface area was not an option for us.
  • Clean look
  • Super simple maintenance
  • Bonus: optimization of sump space

Our cup design: Our cup is 2″ in height, 4″ in diameter. We kept the holes to just the bottom of the cup so that we can use half the amount of floss that we used with the Red Sea cups.

With the cups installed, we gained 6″ of height, which is the perfect space to stash media. Flow is not obstructed and it is super easily to pull out the media for a quick rinse/shake during water change time. TTC on the floss is about 3-4 days for us.

2″ cup height
3x more space for media

Thanks for reading and we hope that you too keep your tank maintenance super simple.

Categories
General

Our Lights.

We’ve been through our fair share….. par what?!

When we start our first 45 gallon tank, all we were concerned with was learning how to maintain a saltwater tank. We knew we wanted clown fish, some softies, and maaaaybe a clam. Well, after many trials and tribulations, we finally got something going that wasn’t just a tank full of algae. Our first light that helped us with our “success” was what is now well known as the 165W Viparspectra. Arguably, we had the best success with this light to date.

When we decided to upgrade our tank, we picked the Red Sea Reefer 350 for a myriad of reasons. Primarily, we wanted something that looked super sleek with a sump. This also led us to light #2 – Current USA Orbit Marine LED Aquarium Light.

This light was great looking, but we shortly found out that it wasn’t going to grow much more than the softies we already had and we were looking to get into acros and a clam or two. We considered going back to Viparspectra, but then after reading up in Reef2Reef forums, we found Noopsyche K7 Pro 2 LED. It received raving reviews on spectrum and value. We had success with black box before, so why not!

As you can see, we paired it with the Red Sea LED Pendant set up for the same reason as before – looking for something super sleek and clean. We had 2 units at first – set front to back/width-wise. It didn’t cover enough length of the tank. We then tried to make some makeshift brackets so that we could sit them length-wise. Not pretty.

We even added a third light to get more light and tried to fill in more void. Still no bueno.

SO after several iterations, we designed our own tray adapters to really give it that finished look. We took it a step further and added integrated fans. They are plugged into our Neptune APEX and set to turn on when tank temperatures hit 82F. Let’s go summer! We’re ready!

If you like how the lights look and are curious how the coral like them, check out our other blog posts and judge for yourself! Keeping it super simple….reef on!

Categories
General

Blastos.

One of the first corals in our tank – The Big Polyp Blastomussa Coral is also commonly known as Blastomussa Pineapple Coral or just Blastos. They are considered LPS. We first stumbled upon this coral as an add-on coral in a bulk buy.

This wellsi is a stunning red with deep blue center. Started out with about 5 polyps. This is about 6 months of growth.

So shortly after the first, we bought a few more. We ended up with 3 more wellsis and a merletti – from Australia. Blastos can come in blue, brown, red, green, or a combination of all of these colors. There’s two common types that we are aware of: wellsi and merletti. Wellsi has larger polyps and is the first type that we got. Who knew that this coral would quickly become one of our favs.

Growth rates vary. Average seems to be 1 polyp every 2 months or so. Wellsis seemingly growing faster than the merletti for us.

It was hard at the time to really tell the polyp size difference between wellsi and merletti when buying online, but when you see them next to each other, it’s much more apparent.

What we learned: Placement

Blastos are a pretty hardy and low maintenance coral. We learned pretty quickly that they like low water current and moderate to low light levels. In fact, with too high of either, the wellsi start looking like merletti!

What we learned: Food

Blastos, like other LPS, get majority of its nutritional requirements through photosynthesis. It does not require additional food to maintain health, but we have target fed mysis and they do have small feeder tentacles that come out where food will stick. Regardless of whether it makes a significant growth difference – it’s fun to target feed! We also found that routinely feeding amino acids make them their fluffiest the next day! We have used both Red Sea Plus AB+ as well as AquaVitro Fuel.

What we learned: Conclusion

WE LOVE BLASTOS. They are seemingly underrated. We love how low maintenance they are yet they can easily be the “feature of the tank.” They are non invasive yet a good grower, colorful, have good movement, and look great in clusters. All wins in our book.

Categories
General

Our Tank.

We currently have a Red Sea Reefer 350 that has been set up since December 2018.  It’s set up as a mixed reef, but has just recently had SPS added.

Current equipment set up:

We recently re-aquascaped the tank using the recently showcased Tidal Gardens method  and we couldn’t be happier with the results.  If only we knew about this back in 2018!

In our next post, we’ll show you what coral we currently have.